所處理的大部分代碼都會存放在?src?目錄中。NestJS CLI 已經(jīng)為您預(yù)先創(chuàng)建了一些基礎(chǔ)文件,其中幾個尤為關(guān)鍵:
src/app.module.ts:這是應(yīng)用程序的根模塊,承載著整個應(yīng)用的配置與組件。src/app.controller.ts:這是一個基礎(chǔ)控制器,包含了一個簡單的路由 /,該路由會返回一個“Hello World!”的提示信息。src/main.ts:這是應(yīng)用程序的啟動入口,負(fù)責(zé)啟動并運(yùn)行 NestJS 應(yīng)用。要啟動項目,您可以執(zhí)行以下命令:
npm run start:dev該命令將監(jiān)視您的文件,每當(dāng)您進(jìn)行更改時自動重新編譯和重新加載服務(wù)器。要驗證服務(wù)器是否正在運(yùn)行,請轉(zhuǎn)到URL http://localhost:3000/。您應(yīng)該會看到一個空頁面,其中包含消息'Hello World!'。
注意:在學(xué)習(xí)本教程時,您應(yīng)該保持服務(wù)器在后臺運(yùn)行。
本教程將指導(dǎo)您如何在計算機(jī)上通過 Docker 容器安裝并運(yùn)行 PostgreSQL,以作為 NestJS 應(yīng)用的數(shù)據(jù)庫。
注意:若您不打算使用 Docker,還可以選擇在本地搭建 PostgreSQL 實(shí)例,或在 Heroku 上獲取托管的 PostgreSQL 數(shù)據(jù)庫服務(wù)。
首先,在項目的主文件夾中創(chuàng)建一個docker-compose.yml文件:
touch docker-compose.yml這個 docker-compose.yml 文件是一個配置文件,它將包含運(yùn)行docker容器的規(guī)范,其中包含PostgreSQL設(shè)置。在文件中創(chuàng)建以下配置:
# docker-compose.yml


version: '3.8'

services:


  postgres:

    image: postgres:13.5

    restart: always

    environment:

      - POSTGRES_USER=myuser

      - POSTGRES_PASSWORD=mypassword

    volumes:

      - postgres:/var/lib/postgresql/data

    ports:

      - '5432:5432'


volumes:

  postgres:

volumes:  postgres:
關(guān)于此配置,需要了解以下幾點(diǎn):
image 選項定義了要使用的 Docker 鏡像。在這里,您使用的是 postgres 鏡像的 13.5 版本。environment 選項指定了在容器初始化期間傳遞給容器的環(huán)境變量。您可以在此處定義容器將使用的配置選項和機(jī)密信息,例如用戶名和密碼。volumes 選項用于在主機(jī)文件系統(tǒng)中持久化數(shù)據(jù)。ports 選項將主機(jī)上的端口映射到容器中的端口。格式遵循“主機(jī)端口:容器端口”的約定。在本例中,您將主機(jī)上的 5432 端口映射到 postgres 容器的 5432 端口。5432 是 PostgreSQL 傳統(tǒng)上使用的端口。請確保您的機(jī)器上沒有其他服務(wù)正在使用 5432 端口。要啟動 postgres 容器,請打開一個新的終端窗口,并在項目的主文件夾中運(yùn)行以下命令:
docker-compose up如果一切正常,新的終端窗口應(yīng)顯示數(shù)據(jù)庫系統(tǒng)已準(zhǔn)備好接受連接的日志。您應(yīng)該會在終端窗口中看到類似于以下內(nèi)容的日志:
...

postgres_1  | 2022-03-05 12:47:02.410 UTC [1] LOG:  listening on IPv4 address "0.0.0.0", port 5432

postgres_1  | 2022-03-05 12:47:02.410 UTC [1] LOG:  listening on IPv6 address "::", port 5432

postgres_1  | 2022-03-05 12:47:02.411 UTC [1] LOG:  listening on Unix socket "/var/run/postgresql/.s.PGSQL.5432"

postgres_1  | 2022-03-05 12:47:02.419 UTC [1] LOG:  database system is ready to accept connections
恭喜 ??。您現(xiàn)在已成功擁有了自己的 PostgreSQL 數(shù)據(jù)庫!
注意:若您關(guān)閉終端窗口,容器也會隨之停止。為避免這種情況,您可以在命令末尾添加
-d選項,例如:docker-compose up -d。這樣容器就會在后臺持續(xù)運(yùn)行,不會因終端關(guān)閉而中斷。
既然數(shù)據(jù)庫已經(jīng)準(zhǔn)備就緒,接下來就該配置 Prisma 了!
首先,您需要將 Prisma CLI 安裝為項目的開發(fā)依賴項。Prisma CLI 提供了多種命令,方便您與項目進(jìn)行交互。
npm install -D prisma您可以通過運(yùn)行以下命令在項目中初始化 Prisma:
npx prisma init這將創(chuàng)建一個新的 Prisma 目錄和一個 schema.prisma 文件。這是包含數(shù)據(jù)庫模式的主配置文件。這個命令也會在你的項目中創(chuàng)建一個.env 文件。
在?.env?文件中,您會發(fā)現(xiàn)一個名為?DATABASE_URL?的環(huán)境變量,它包含一個虛擬的連接字符串。您需要將這個虛擬的連接字符串替換為您 PostgreSQL 實(shí)例的實(shí)際連接字符串。
// .env

DATABASE_URL="postgres://myuser:mypassword@localhost:5432/median-db"注意:如果您沒有使用 docker(如上一節(jié)所示)來創(chuàng)建 PostgreSQL 數(shù)據(jù)庫,則您的連接字符串將與上面顯示的連接字符串不同。關(guān)于PostgreSQL 的連接字符串格式,您可以在 Prisma 官方文檔中查閱到。
如果打開 prisma/schema.prisma,您應(yīng)該看到以下默認(rèn)模式:
// prisma/schema.prisma


generator client {

  provider = "prisma-client-js"

}


datasource db {

  provider = "postgresql"

  url      = env("DATABASE_URL")

}
schema.prisma 文件是使用 Prisma Schema 語言編寫的,這是 Prisma 用于定義數(shù)據(jù)庫架構(gòu)的專有語言。該文件主要包含以下三個核心組成部分:
DATABASE_URL 環(huán)境變量中可用。注意:有關(guān) Prisma 架構(gòu)的更多信息,請查看 Prisma 文檔。
現(xiàn)在,是時候為您的應(yīng)用程序定義數(shù)據(jù)模型了。在本教程中,我們僅需要一個名為?Article?的模型,用以代表博客上的每一篇文章。
請打開 prisma/schema.prisma 文件,并向其中添加一個全新的 Article 模型:
// prisma/schema.prisma


model Article {

  id          Int      @id @default(autoincrement())

  title       String   @unique

  description String?

  body        String

  published   Boolean  @default(false)

  createdAt   DateTime @default(now())

  updatedAt   DateTime @updatedAt

}您已經(jīng)成功創(chuàng)建了一個功能完備的?Article?模型。該模型包含多個字段,如?id、title?等,每個字段都具備名稱、類型以及可選的特殊屬性(例如?@id、@unique?等)。通過在字段類型后添加??,您可以輕松地將某個字段設(shè)置為可選。
id字段被賦予了@id的特殊屬性,這標(biāo)志著它是該模型的主鍵。而?@default(autoincrement())?屬性則確保每當(dāng)有新記錄創(chuàng)建時,該字段都會自動遞增并分配一個唯一的值。
published字段是指示文章是已發(fā)布還是處于草稿模式的標(biāo)志。@default(false)屬性表示默認(rèn)情況下該字段應(yīng)設(shè)置為false。
兩個DateTime 字段?createdAt 和?updatedAt 將跟蹤文章的創(chuàng)建時間和上次更新時間。@updatedAt屬性會自動將該字段更新為當(dāng)前時間戳,無論何時文章被修改,這個字段都會與當(dāng)前時間同步更新。
定義 Prisma 架構(gòu)后,您將運(yùn)行遷移以在數(shù)據(jù)庫中創(chuàng)建實(shí)際表。要生成并執(zhí)行您的第一個遷移,請在終端中運(yùn)行以下命令:
npx prisma migrate dev --name "init"此命令將執(zhí)行三項操作:
prisma/migrations 文件夾中。這個過程為您的數(shù)據(jù)庫模式變更提供了詳細(xì)的記錄和步驟。package.json 文件的 dependencies 部分找到名為 @prisma/client 的包。Prisma Client是一個功能強(qiáng)大的TypeScript查詢生成器,它根據(jù)您的Prisma模式文件自動生成與數(shù)據(jù)庫交互的代碼。這個客戶端是為您的特定Prisma模式量身定制的,它將大大簡化您向數(shù)據(jù)庫發(fā)送查詢的過程。注意:您可以在 Prisma 文檔中了解有關(guān) Prisma Migrate 的更多信息。
如果成功完成,您應(yīng)該會看到如下消息:
The following migration(s) have been created and applied from new schema changes:


migrations/

  └─ 20220528101323_init/

    └─ migration.sql


Your database is now in sync with your schema.

...

? Generated Prisma Client (3.14.0 | library) to ./node_modules/@prisma/client in 31ms
檢查生成的遷移文件,了解 Prisma Migrate 在幕后的作用:
-- prisma/migrations/20220528101323_init/migration.sql


-- CreateTable

CREATE TABLE "Article" (

    "id" SERIAL NOT NULL,

    "title" TEXT NOT NULL,

    "description" TEXT,

    "body" TEXT NOT NULL,

    "published" BOOLEAN NOT NULL DEFAULT false,

    "createdAt" TIMESTAMP(3) NOT NULL DEFAULT CURRENT_TIMESTAMP,

    "updatedAt" TIMESTAMP(3) NOT NULL,


    CONSTRAINT "Article_pkey" PRIMARY KEY ("id")

);


-- CreateIndex

CREATE UNIQUE INDEX "Article_title_key" ON "Article"("title");注意:遷移文件的名稱將略有不同。
這是在PostgreSQL數(shù)據(jù)庫中創(chuàng)建 Article 表所需的SQL。它是由Prisma根據(jù)您的Prisma模式自動生成和執(zhí)行的。
目前,數(shù)據(jù)庫為空。因此,您將創(chuàng)建一個種子腳本,該腳本將使用一些虛擬數(shù)據(jù)填充數(shù)據(jù)庫。
首先,創(chuàng)建一個名為prisma/seed.ts的文件,這個文件將包含初始化數(shù)據(jù)庫種子所需的模擬數(shù)據(jù)和查詢。
touch prisma/seed.ts然后,在seed文件中添加以下代碼:
// prisma/seed.ts


import { PrismaClient } from '@prisma/client';


// initialize Prisma Client

const prisma = new PrismaClient();


async function main() {

  // create two dummy articles

  const post1 = await prisma.article.upsert({

    where: { title: 'Prisma Adds Support for MongoDB' },

    update: {},

    create: {

      title: 'Prisma Adds Support for MongoDB',

      body: 'Support for MongoDB has been one of the most requested features since the initial release of...',

      description:

        "We are excited to share that today's Prisma ORM release adds stable support for MongoDB!",

      published: false,

    },

  });


  const post2 = await prisma.article.upsert({

    where: { title: "What's new in Prisma? (Q1/22)" },

    update: {},

    create: {

      title: "What's new in Prisma? (Q1/22)",

      body: 'Our engineers have been working hard, issuing new releases with many improvements...',

      description:

        'Learn about everything in the Prisma ecosystem and community from January to March 2022.',

      published: true,

    },

  });


  console.log({ post1, post2 });

}


// execute the main function

main()

  .catch((e) => {

    console.error(e);

    process.exit(1);

  })

  .finally(async () => {

    // close Prisma Client at the end

    await prisma.$disconnect();

});在這個腳本中,首先需要初始化Prisma客戶端。接著,使用prisma.upsert()函數(shù)來創(chuàng)建兩個項目。upsert函數(shù)只會在沒有文章符合where條件時才創(chuàng)建一個新文章。您選擇使用upsert查詢而不是create查詢,這是因為upsert可以避免因意外嘗試兩次插入相同記錄而產(chǎn)生的錯誤。
您需要指定Prisma在執(zhí)行種子命令時運(yùn)行哪個腳本。您可以通過在 package.json 文件的末尾添加 prisma.seed 鍵來實(shí)現(xiàn)這一點(diǎn):
// package.json


// ...

  "scripts": {

    // ...

  },

  "dependencies": {

    // ...

  },

  "devDependencies": {

    // ...

  },

  "jest": {

    // ...

  },

  "prisma": {

    "seed": "ts-node prisma/seed.ts"

  }
seed 命令將執(zhí)行您之前定義的 prisma/seed.ts 腳本。由于ts-node已經(jīng)作為開發(fā)依賴安裝在您的package.json中,這個命令應(yīng)該能夠自動運(yùn)行。
請使用以下命令來執(zhí)行數(shù)據(jù)庫的種子數(shù)據(jù)初始化:
npx prisma db seed您應(yīng)該會看到以下輸出:
Running seed command ts-node prisma/seed.ts ...
{
  post1: {
    id: 1,
    title: 'Prisma Adds Support for MongoDB',
    description: "We are excited to share that today's Prisma ORM release adds stable support for MongoDB!",
    body: 'Support for MongoDB has been one of the most requested features since the initial release of...',
    published: false,
    createdAt: 2022-04-24T14:20:27.674Z,
    updatedAt: 2022-04-24T14:20:27.674Z
  },
  post2: {
    id: 2,
    title: "What's new in Prisma? (Q1/22)",
    description: 'Learn about everything in the Prisma ecosystem and community from January to March 2022.',
    body: 'Our engineers have been working hard, issuing new releases with many improvements...',
    published: true,
    createdAt: 2022-04-24T14:20:27.705Z,
    updatedAt: 2022-04-24T14:20:27.705Z
  }
}

?? The seed command has been executed.注意:您可以在 Prisma Docs 中了解有關(guān)種子設(shè)定的更多信息。
在NestJS應(yīng)用程序中,將Prisma Client API從應(yīng)用邏輯中抽象出來是一個好習(xí)慣。為此,您將創(chuàng)建一個新的服務(wù)來封裝Prisma Client。這個服務(wù)名為 PrismaService,它負(fù)責(zé)創(chuàng)建一個 PrismaClient 實(shí)例并連接到您的數(shù)據(jù)庫。
Nest CLI提供了一種方便的方法,可以直接從命令行界面(CLI)生成模塊和服務(wù)。在終端中運(yùn)行以下命令:
npx nest generate module prisma

npx nest generate service prisma
注 1:如有需要,請參考 NestJS 文檔了解服務(wù)和模塊的介紹。
注 2:在某些情況下,在服務(wù)器已經(jīng)運(yùn)行的情況下運(yùn)行
nest generate命令可能會導(dǎo)致NestJS拋出異常:Error: Cannot find module './app.controller'。如果您遇到此錯誤,請從終端運(yùn)行以下命令:rm -rf dist并重新啟動服務(wù)器。
這應(yīng)該會生成一個新的帶有./src/prisma 和 prisma.module.ts 文件的文件夾 prisma.service.ts。服務(wù)文件應(yīng)包含以下代碼:
// src/prisma/prisma.service.ts


import { INestApplication, Injectable } from '@nestjs/common';

import { PrismaClient } from '@prisma/client';


@Injectable()

export class PrismaService extends PrismaClient {}
Prisma模塊將負(fù)責(zé)創(chuàng)建 PrismaService 的單例實(shí)例,并允許在整個應(yīng)用程序中共享服務(wù)。要做到這一點(diǎn),你需要將 PrismaService 添加到 exports 文件中的 prisma.module.ts 數(shù)組中:
// src/prisma/prisma.module.ts


import { Module } from '@nestjs/common';

import { PrismaService } from './prisma.service';


@Module({

  providers: [PrismaService],

  exports: [PrismaService],

})

export class PrismaModule {}現(xiàn)在,任何導(dǎo)入PrismaModule的模塊都可以訪問PrismaService,并將其注入到自己的組件/服務(wù)中。這是NestJS應(yīng)用程序的常見模式。
完成后,您就完成了 Prisma 的設(shè)置!您現(xiàn)在可以開始構(gòu)建 REST API。
Swagger 是一個基于 OpenAPI 規(guī)范來記錄 API 的工具。Nest 提供了一個專門的 Swagger 模塊,您很快就會用到它。
首先安裝所需的依賴項:
npm install --save @nestjs/swagger swagger-ui-express現(xiàn)在打開 main.ts 并使用 SwaggerModule 類初始化Swagger:
// src/main.ts
import { NestFactory } from '@nestjs/core';
import { AppModule } from './app.module';
import { SwaggerModule, DocumentBuilder } from '@nestjs/swagger';
async function bootstrap() {
const app = await NestFactory.create(AppModule);
const config = new DocumentBuilder()
.setTitle('Median')
.setDescription('The Median API description')
.setVersion('0.1')
.build();
const document = SwaggerModule.createDocument(app, config);
SwaggerModule.setup('api', app, document);
await app.listen(3000);
}
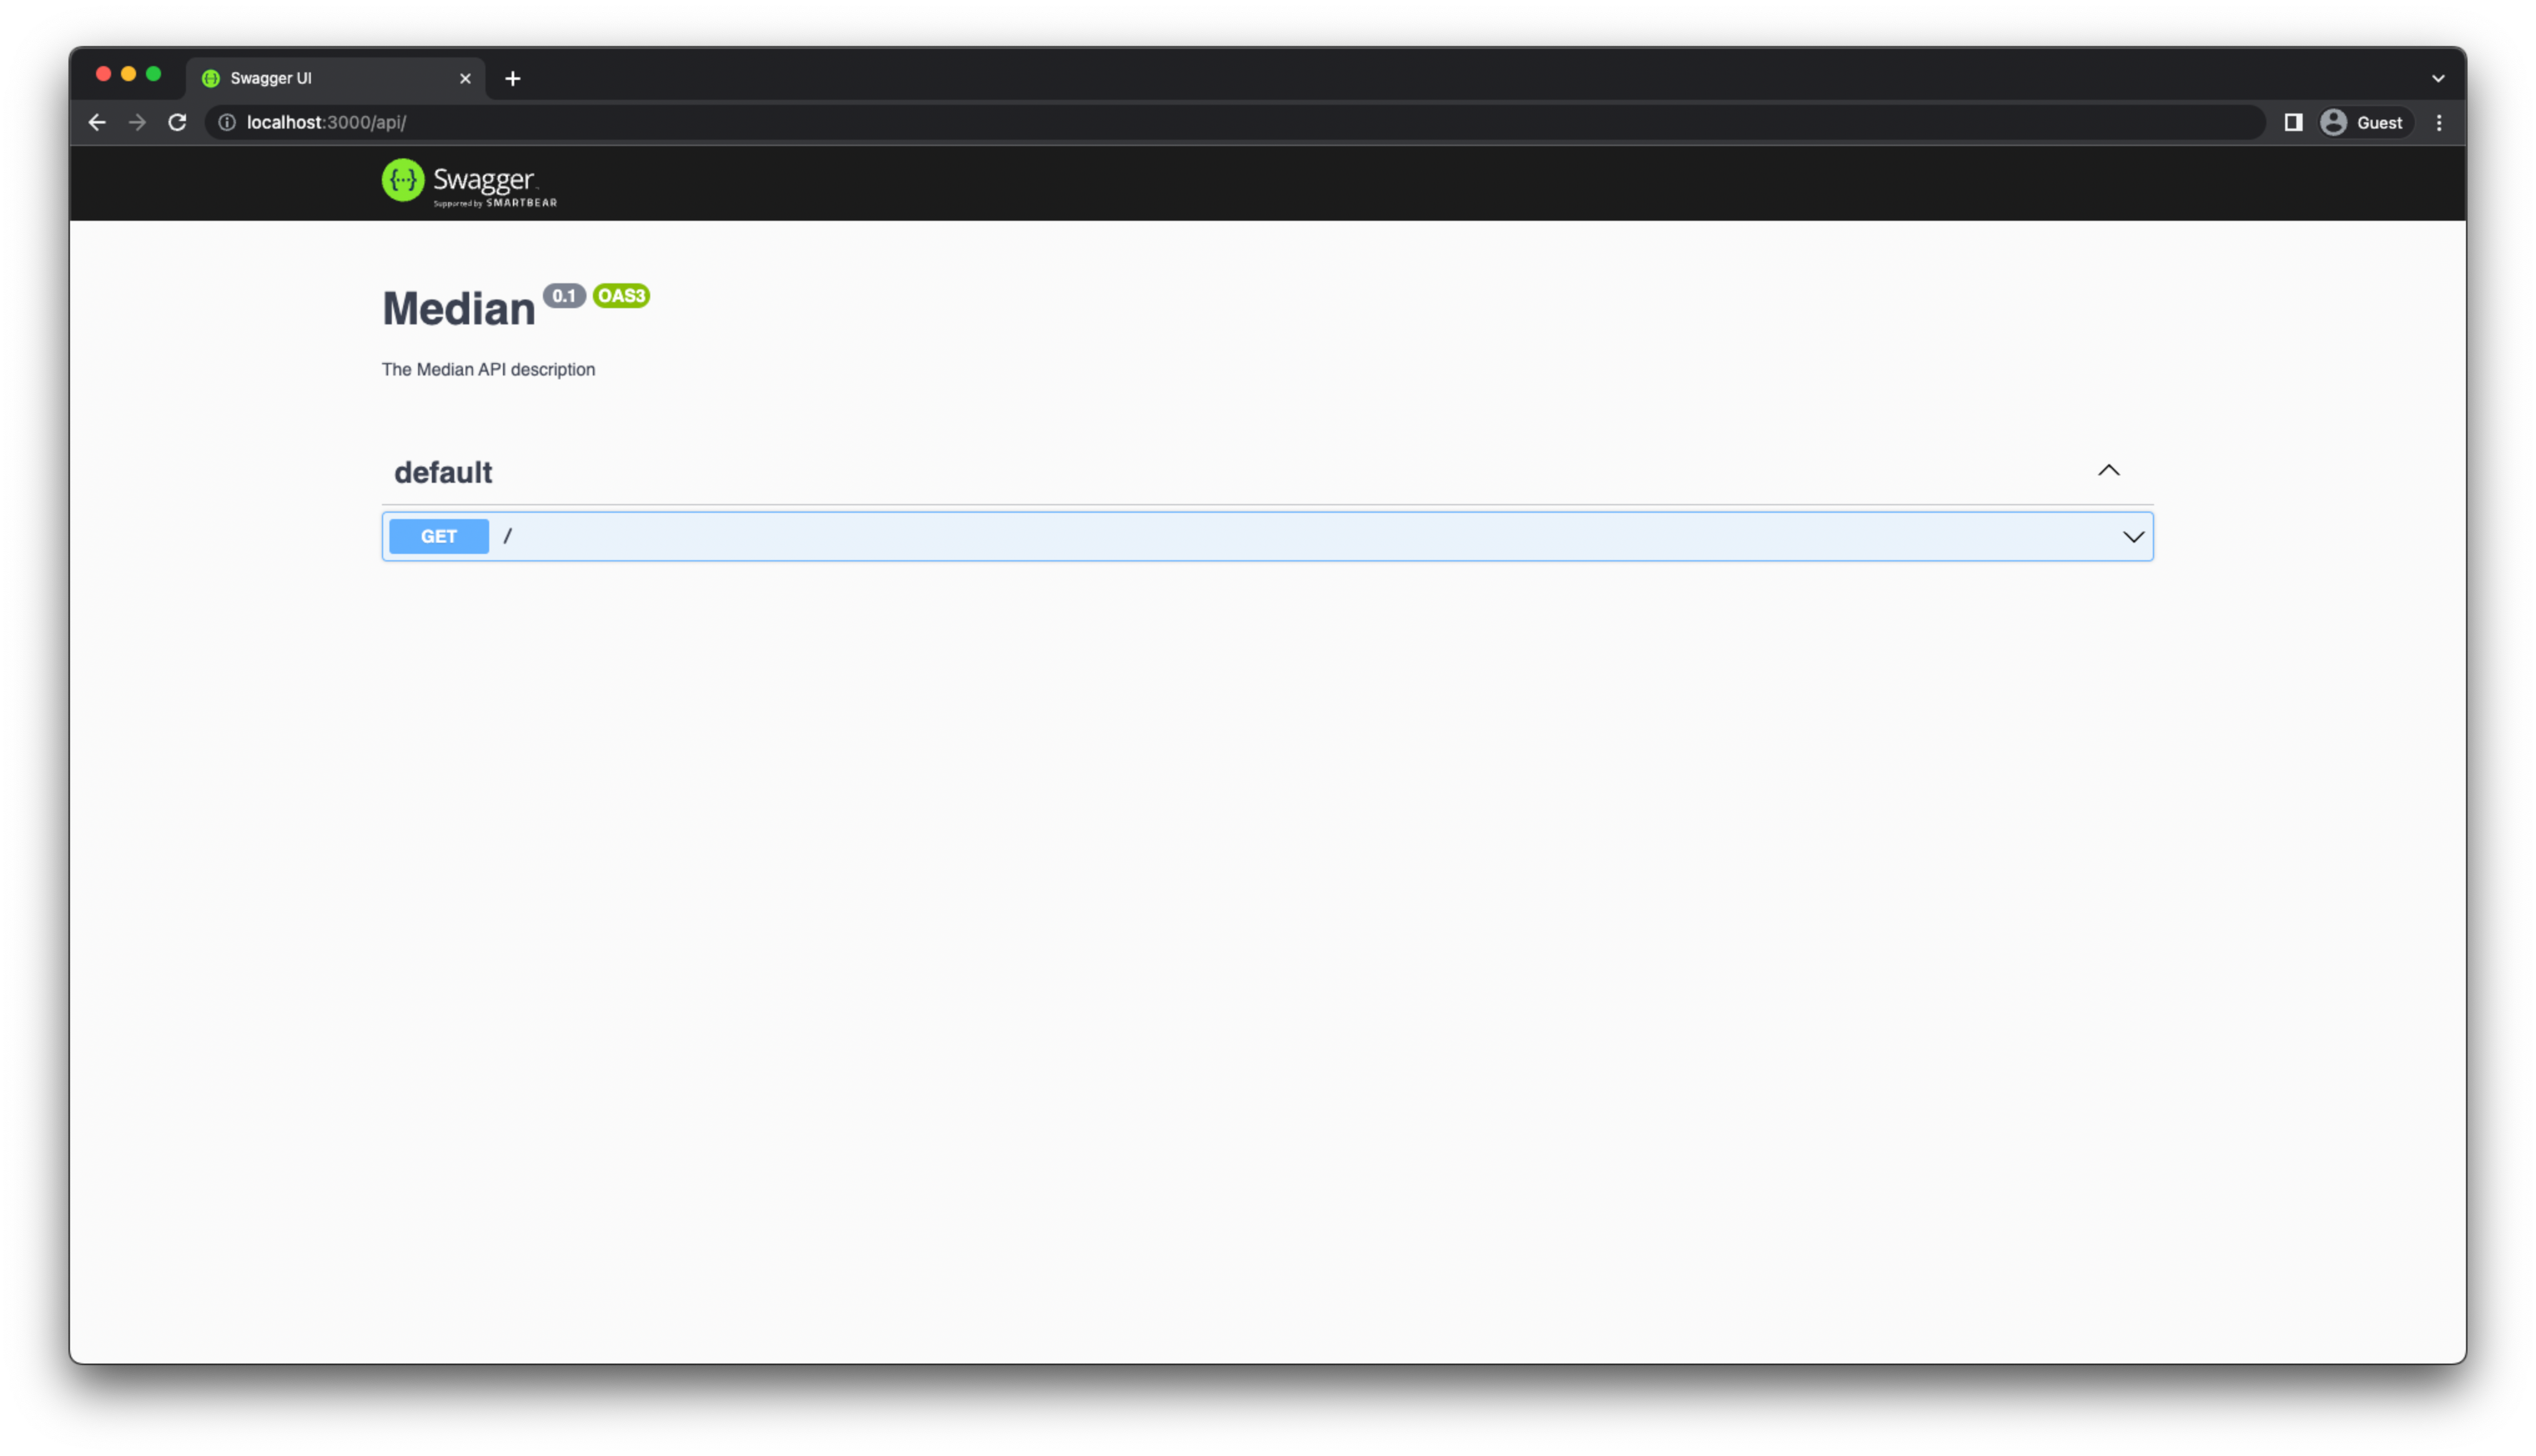
bootstrap();當(dāng)應(yīng)用程序運(yùn)行時,打開瀏覽器并導(dǎo)航到 http://localhost:3000/api. 您應(yīng)該能夠看到 Swagger UI 界面。
在本節(jié)中,您將為Article模型實(shí)現(xiàn)創(chuàng)建(Create)、讀取(Read)、更新(Update)和刪除(Delete)操作,以及任何相關(guān)的業(yè)務(wù)邏輯。
在您能夠?qū)崿F(xiàn)REST API之前,您需要為Article模型生成REST資源。這可以通過Nest CLI快速完成。在終端中運(yùn)行以下命令
npx nest generate resource您將收到一些 CLI 提示。請相應(yīng)地回答問題:
現(xiàn)在您應(yīng)該在src/articles目錄下找到了所有REST端點(diǎn)的樣板代碼。在src/articles/articles.controller.ts文件中,您將看到不同路由(也稱為路由處理器)的定義。處理每個請求的業(yè)務(wù)邏輯封裝在src/articles/articles.service.ts文件中。目前,這個文件包含一些虛擬實(shí)現(xiàn)。
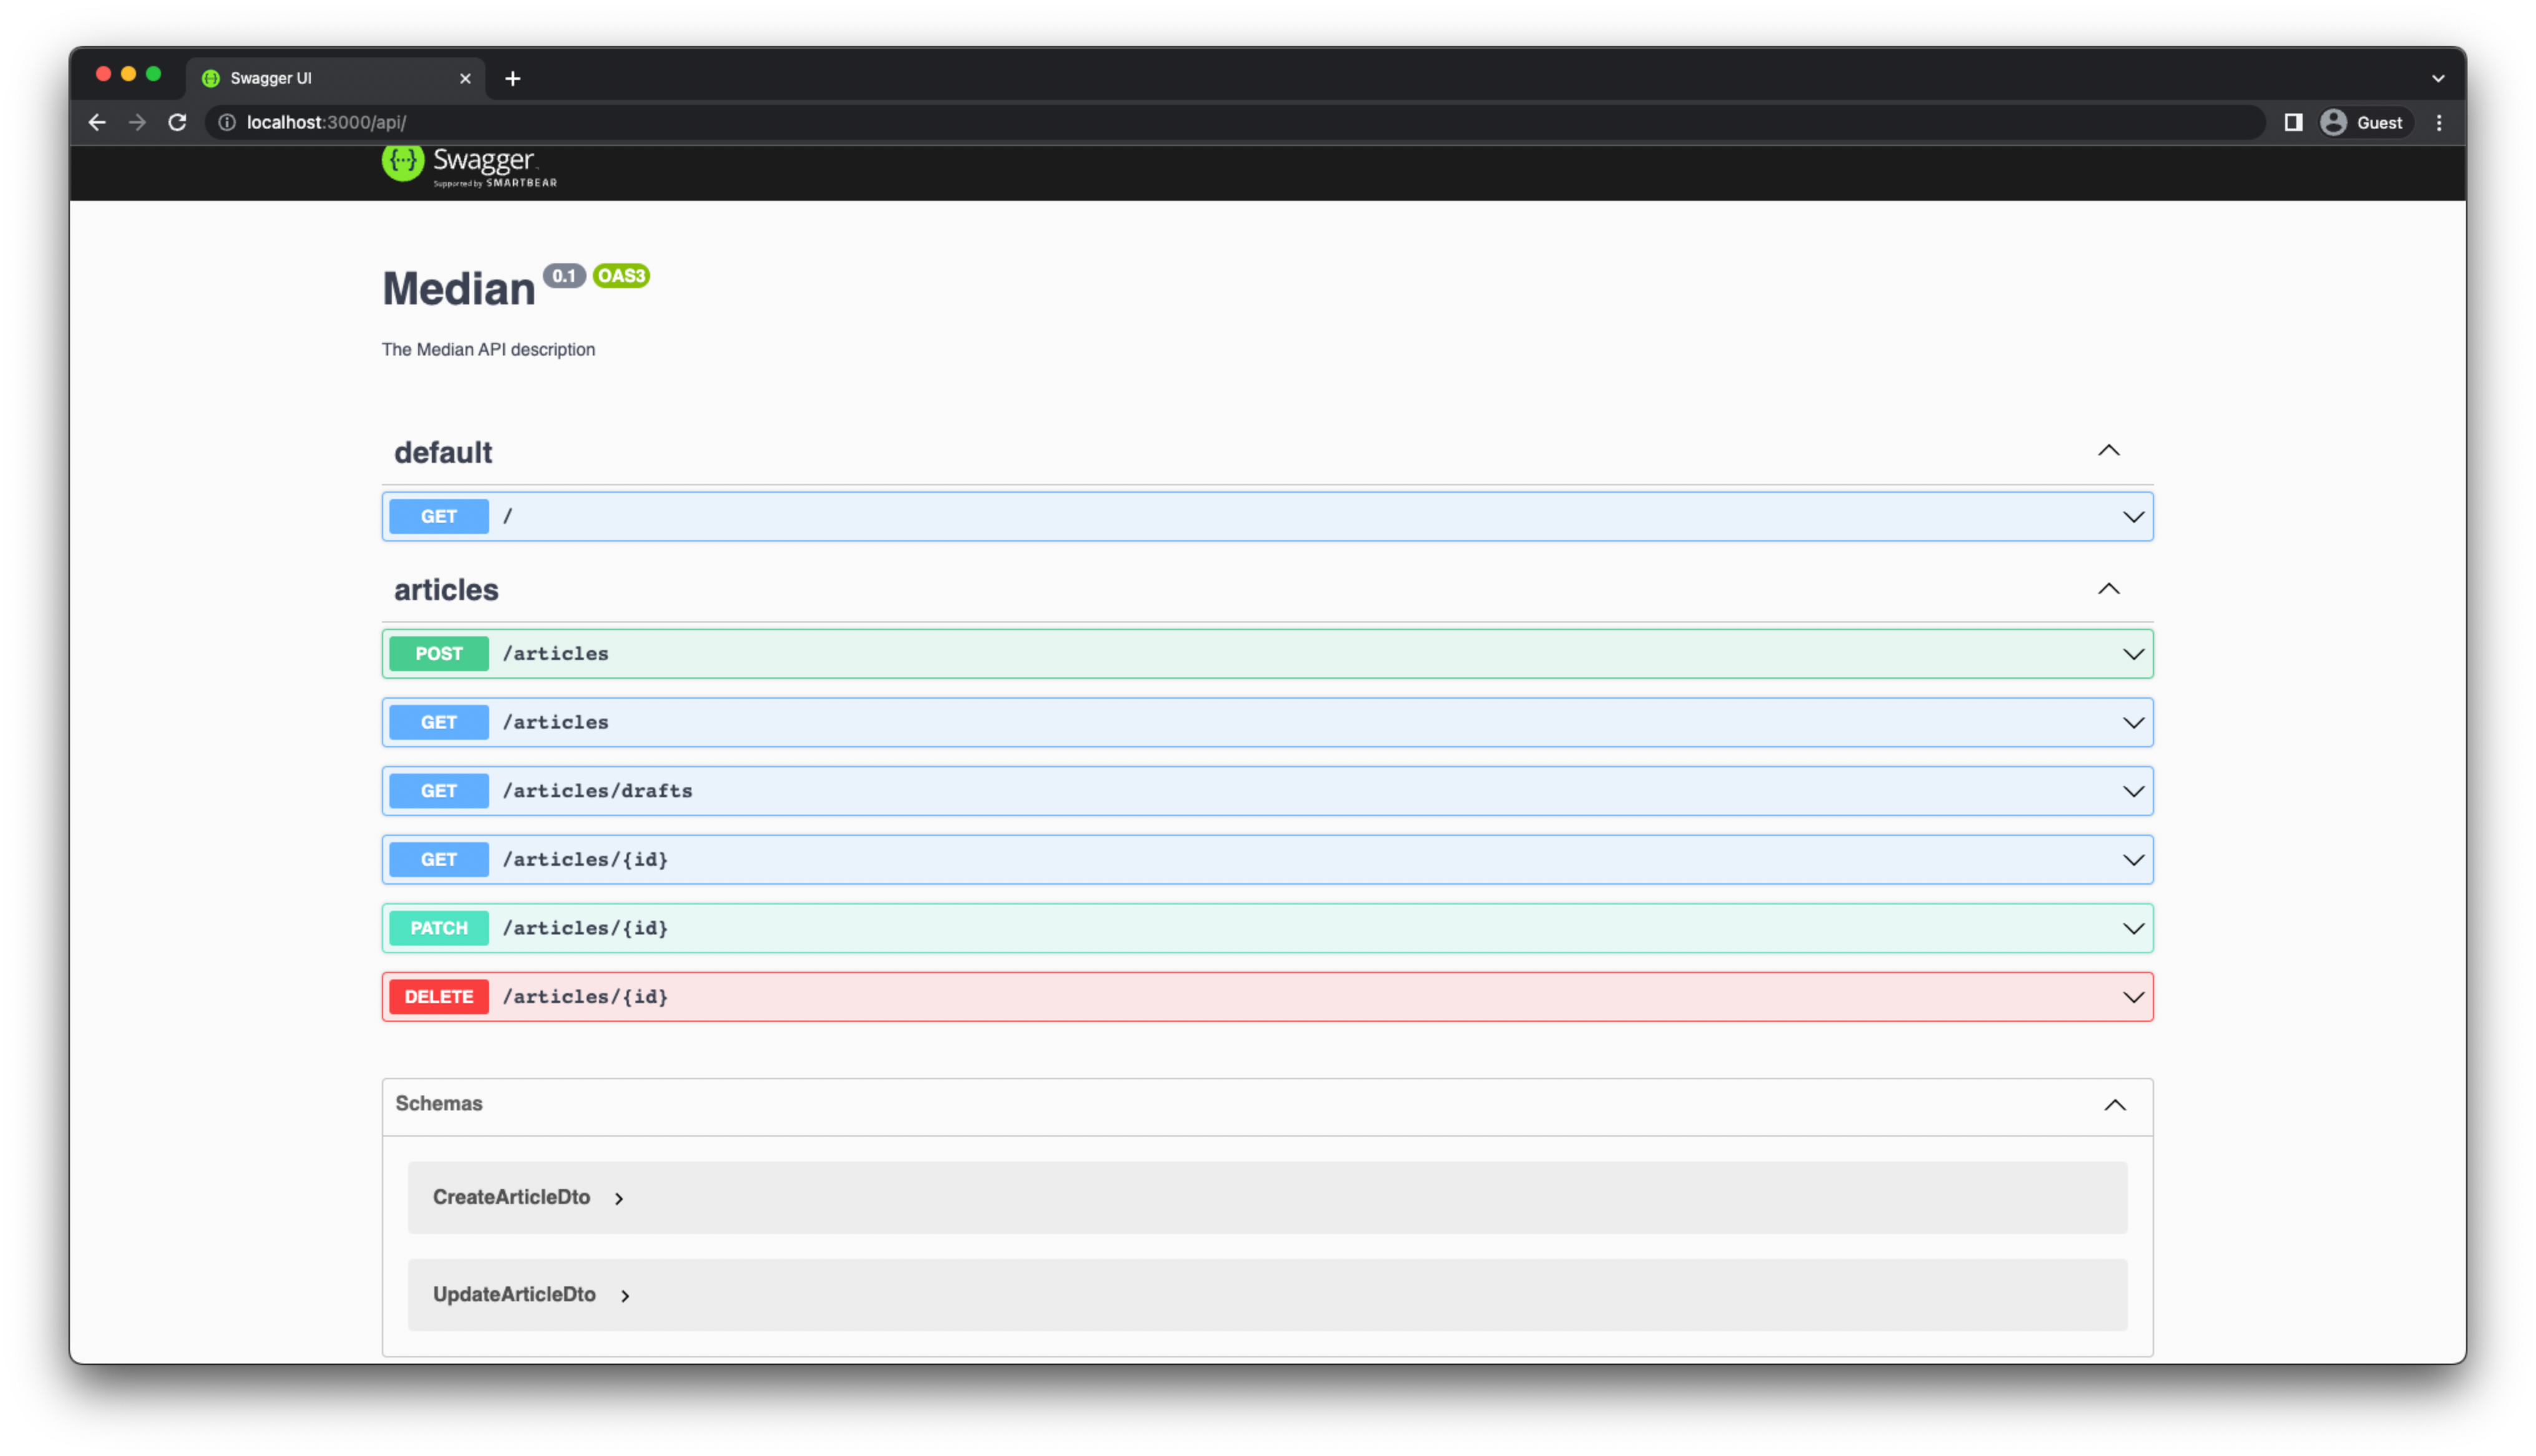
如果您再次打開 Swagger API 頁面,您應(yīng)該會看到如下內(nèi)容:
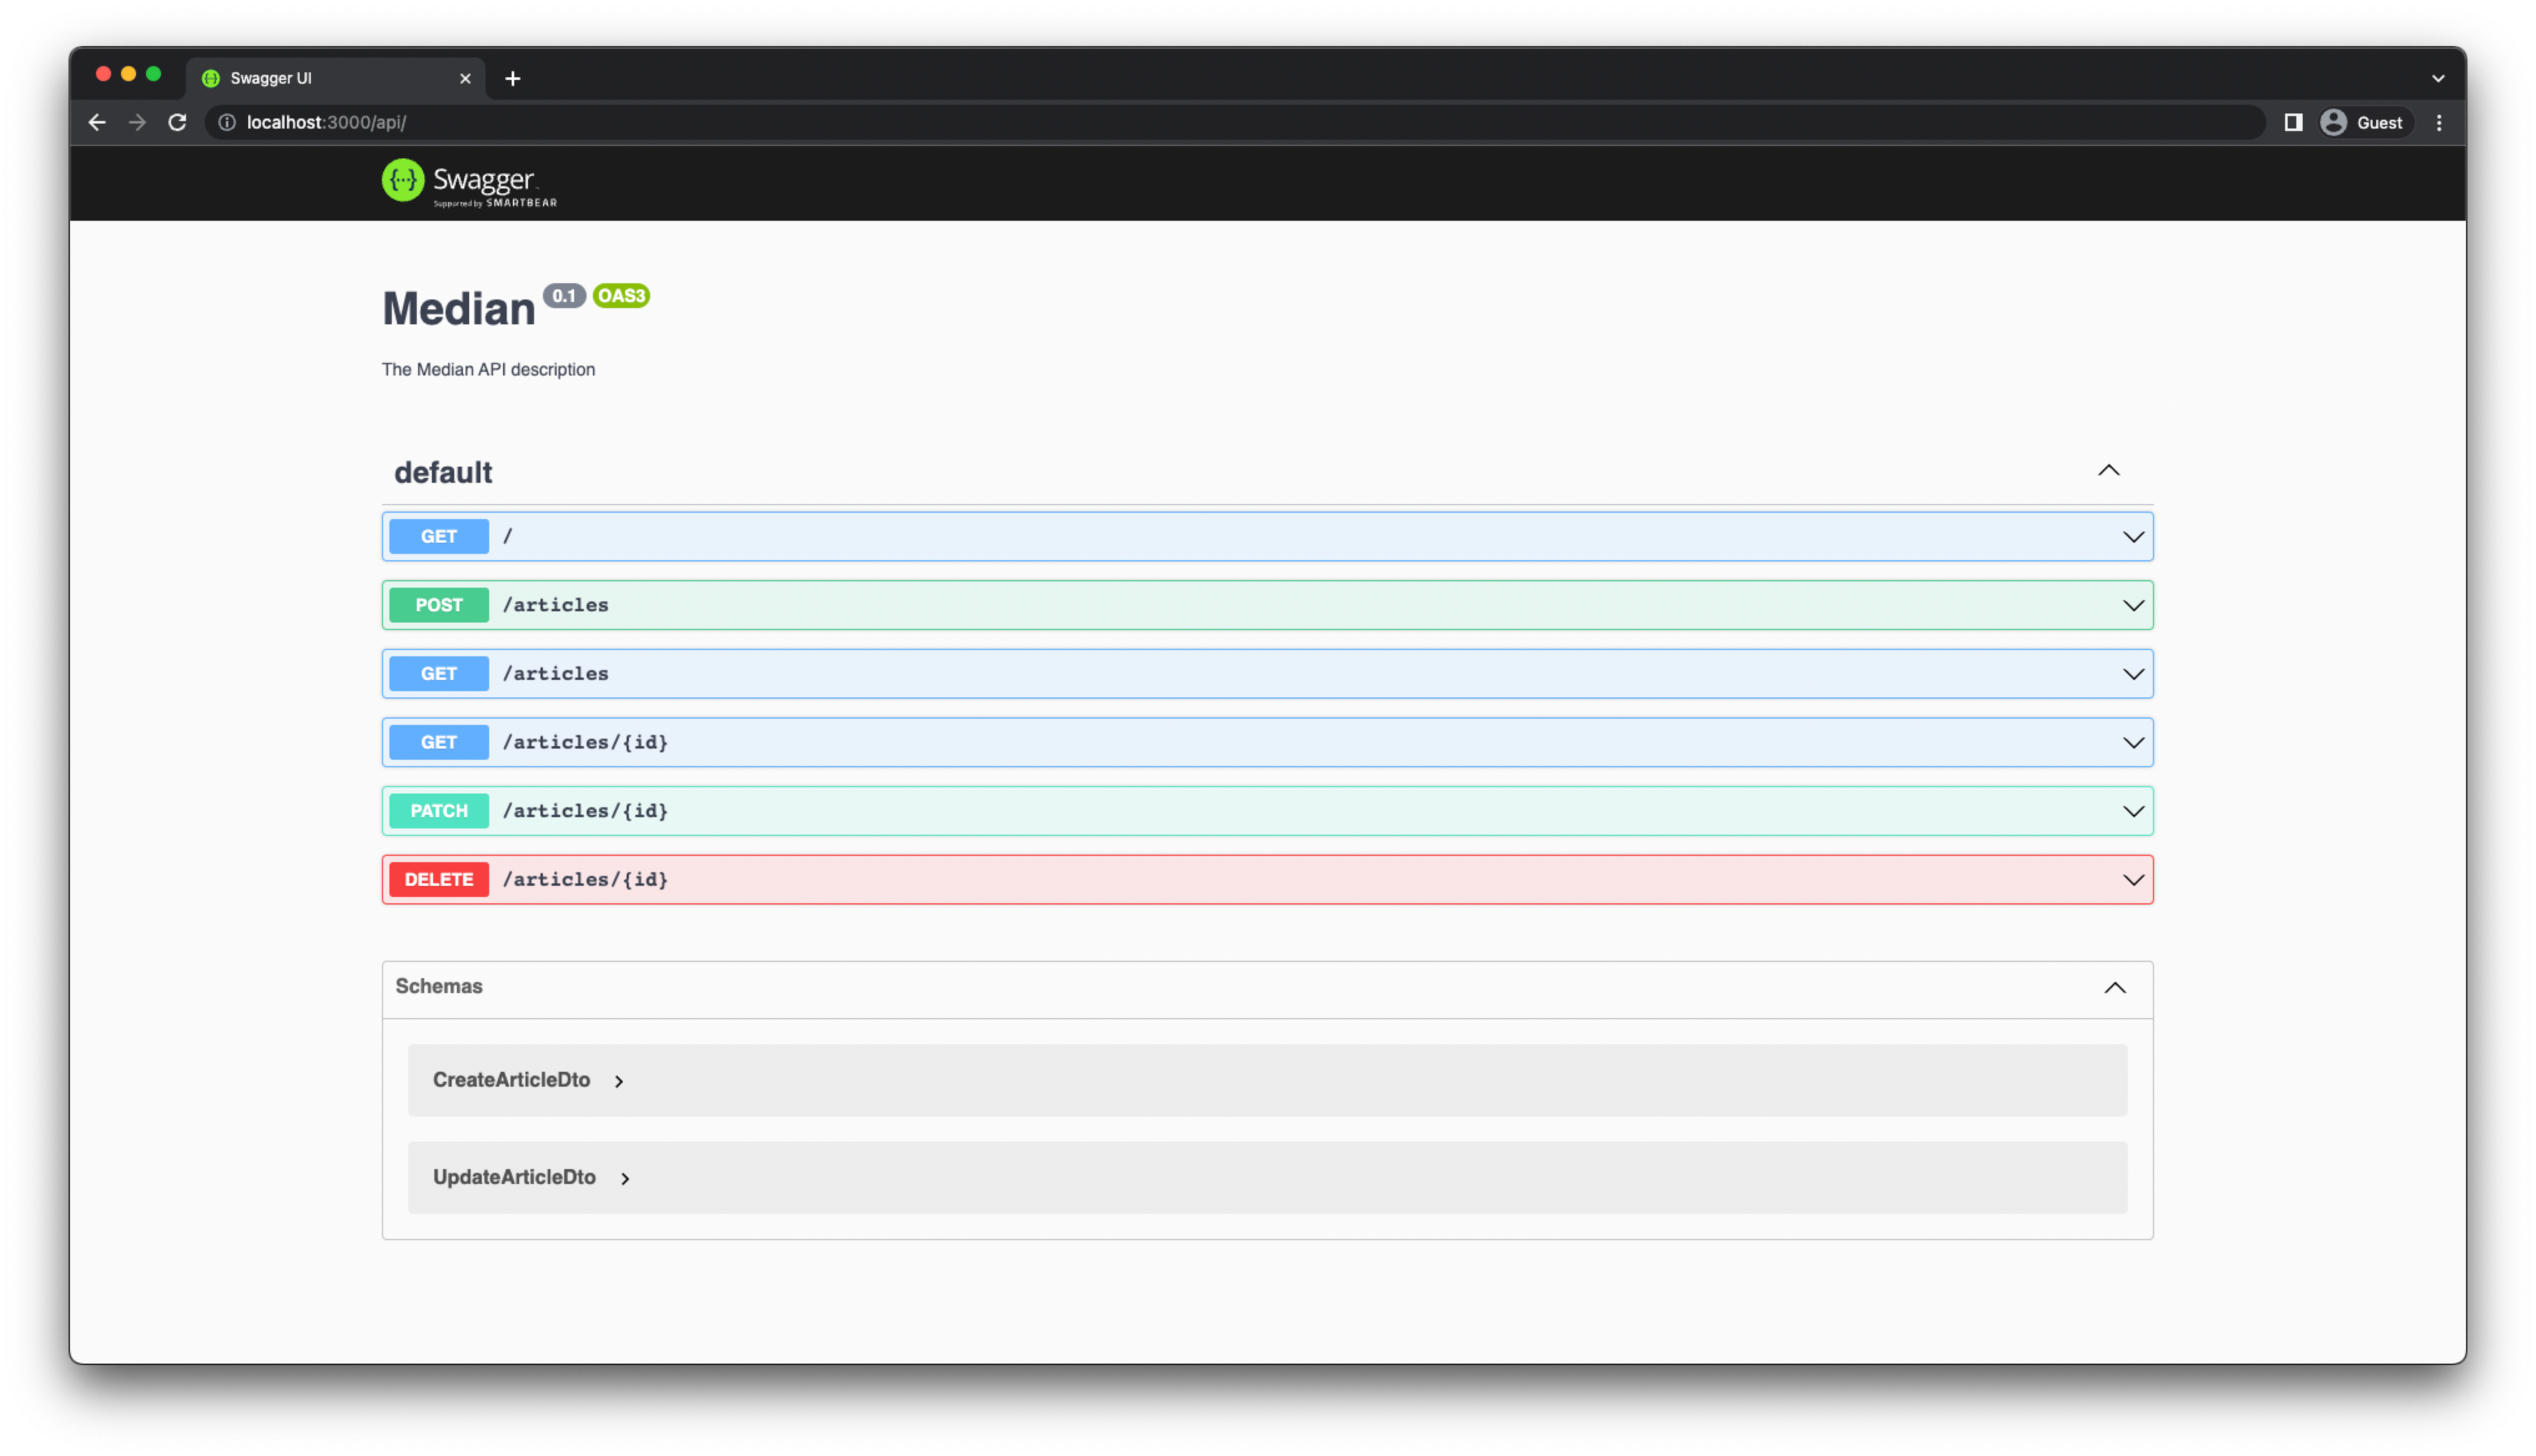
SwaggerModule會搜索所有路由處理器上的@Body()、@Query()和@Param()裝飾器,以生成這個API頁面。
要在Articles模塊內(nèi)訪問PrismaClient,您必須將PrismaModule作為一個導(dǎo)入添加。在ArticlesModule中添加以下導(dǎo)入:
// src/articles/articles.module.ts


import { Module } from '@nestjs/common';

import { ArticlesService } from './articles.service';

import { ArticlesController } from './articles.controller';

import { PrismaModule } from 'src/prisma/prisma.module';


@Module({

  controllers: [ArticlesController],

  providers: [ArticlesService],

  imports: [PrismaModule],

})

export class ArticlesModule {}
您現(xiàn)在可以將 PrismaService 注入到 ArticlesService 中,并使用它來訪問數(shù)據(jù)庫。為此,您需要在articles.service.ts文件中添加一個構(gòu)造函數(shù),如下所示:
// src/articles/articles.service.ts


import { Injectable } from '@nestjs/common';

import { CreateArticleDto } from './dto/create-article.dto';

import { UpdateArticleDto } from './dto/update-article.dto';

import { PrismaService } from 'src/prisma/prisma.service';


@Injectable()

export class ArticlesService {

  constructor(private prisma: PrismaService) {}


  // CRUD operations

}該端點(diǎn)的控制器名為 findAll。此端點(diǎn)將返回數(shù)據(jù)庫中所有已發(fā)布的文章。findAll 控制器的實(shí)現(xiàn)如下所示:
// src/articles/articles.controller.ts


@Get()

findAll() {

  return this.articlesService.findAll();

}
您需要更新 ArticlesService.findAll()以返回數(shù)據(jù)庫中所有已發(fā)布文章的數(shù)組:
// src/articles/articles.service.ts


@Injectable()

export class ArticlesService {

  constructor(private prisma: PrismaService) {}


  create(createArticleDto: CreateArticleDto) {

    return 'This action adds a new article';

  }


  findAll() {

    return This action returns all articles;
    return this.prisma.article.findMany({ where: { published: true } });
  }
findMany 查詢將返回與 article 條件匹配的所有 where 記錄。
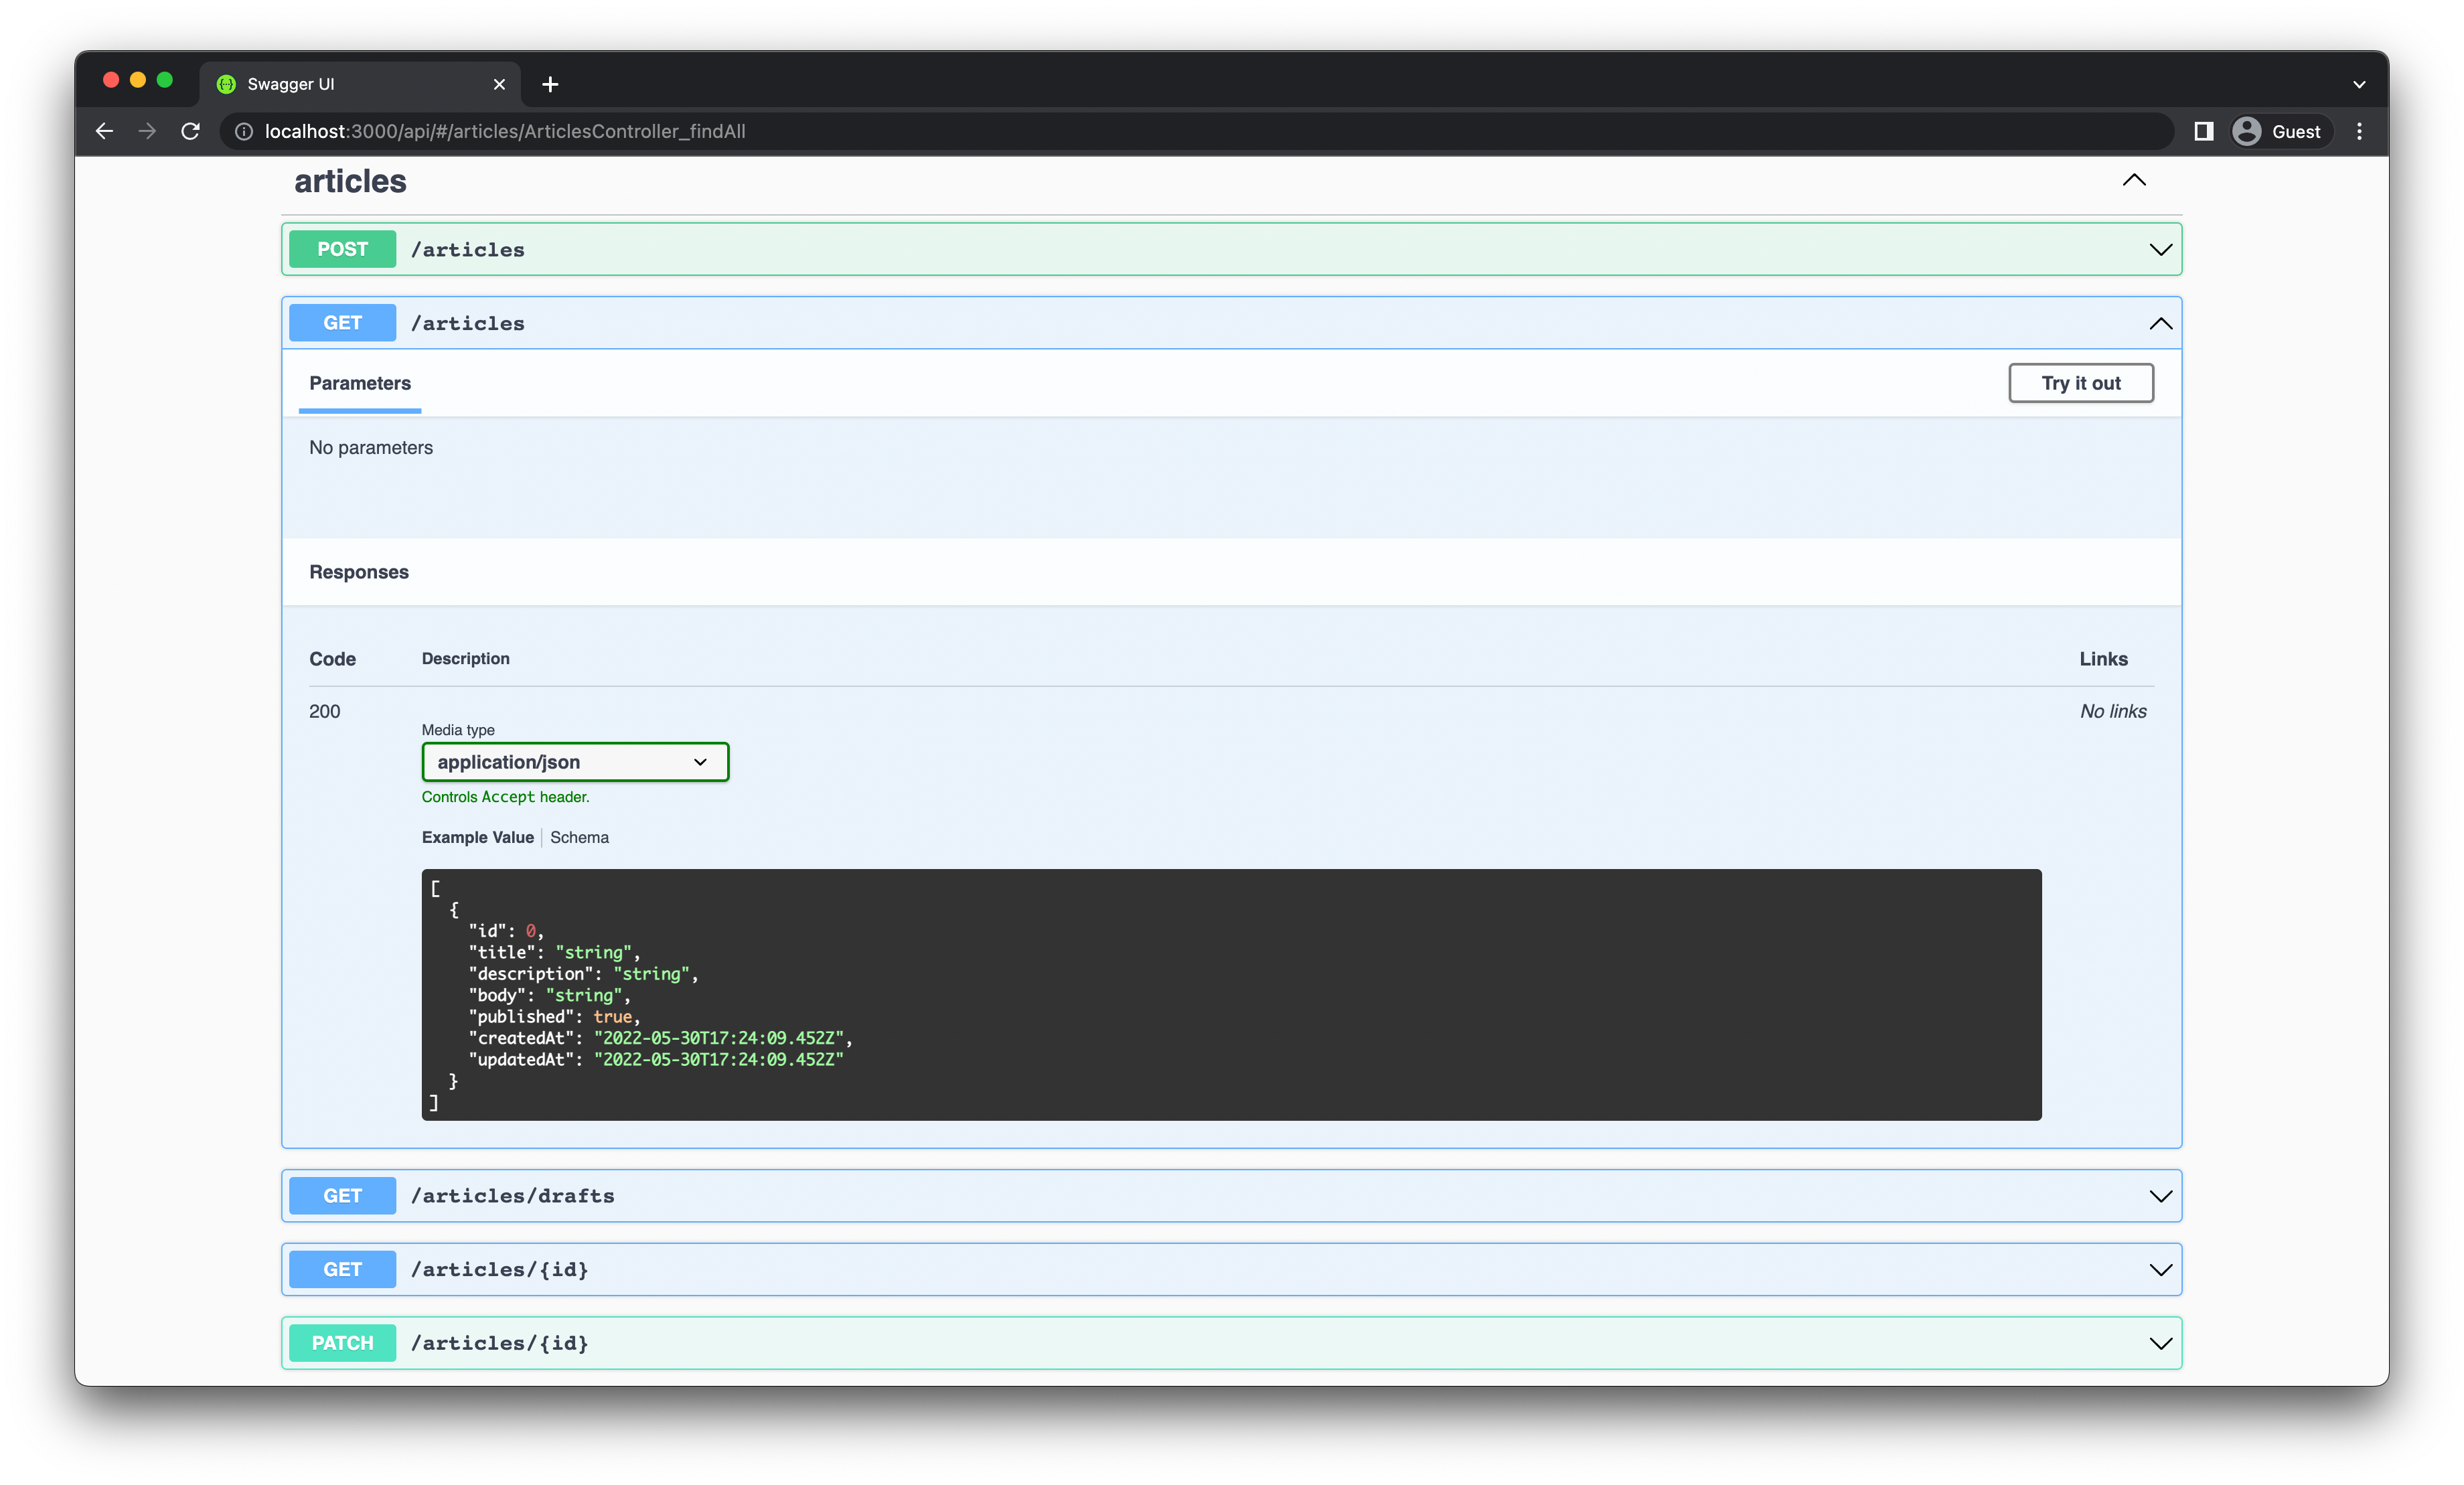
您可以通過訪問 http://localhost:3000/api 并點(diǎn)擊 GET /articles 菜單來測試這個端點(diǎn)。點(diǎn)擊“Try it out”,然后點(diǎn)擊“Execute”按鈕來查看結(jié)果。
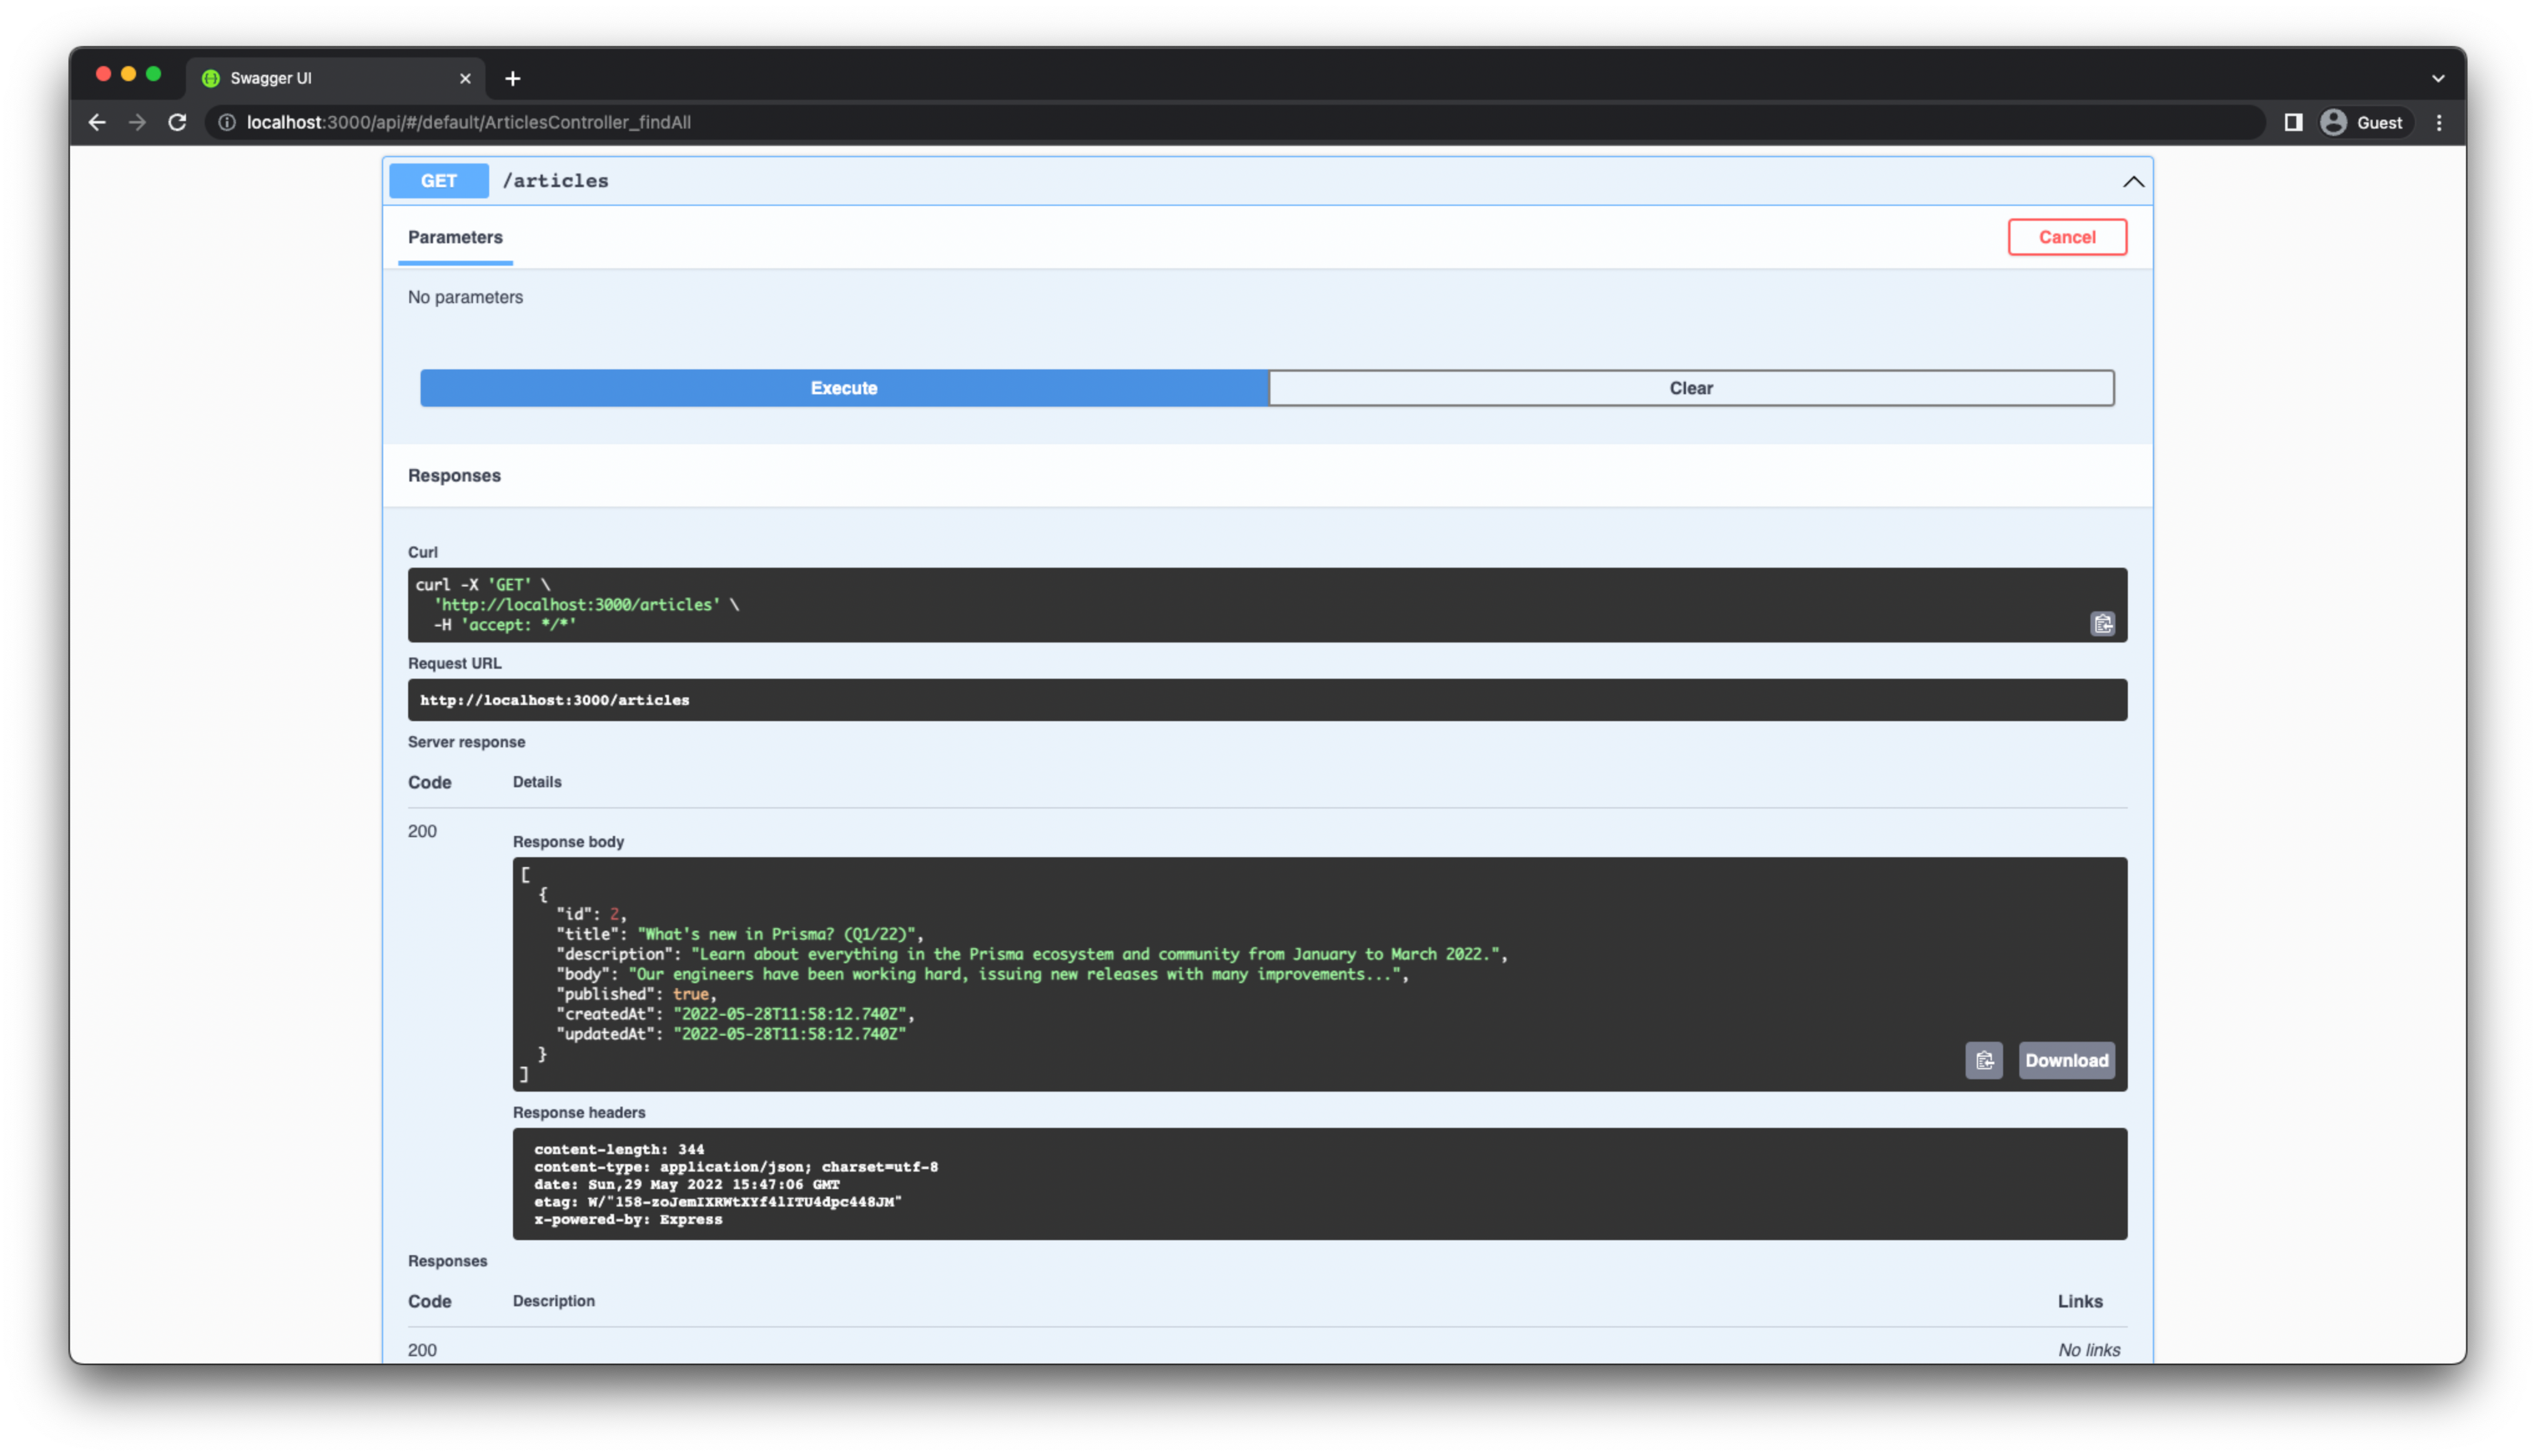
注意:您也可以直接在瀏覽器中運(yùn)行所有請求,或者通過REST客戶端(如Postman)運(yùn)行所有請求。Swagger還為每個請求生成curl命令,以防您希望在終端中運(yùn)行HTTP請求。
您將定義一個新的路由來獲取所有未發(fā)布的文章。NestJS 沒有為這個端點(diǎn)自動生成控制器路由處理器,因此您需要自行編寫它。
// src/articles/articles.module.ts


import { Module } from '@nestjs/common';

import { ArticlesService } from './articles.service';

import { ArticlesController } from './articles.controller';

import { PrismaModule } from 'src/prisma/prisma.module';


@Module({

  controllers: [ArticlesController],

  providers: [ArticlesService],

  imports: [PrismaModule],

})

export class ArticlesModule {}你的編輯器應(yīng)該顯示一個錯誤,提示沒有名為articlesService.findDrafts()的函數(shù)存在。要解決這個問題,請在 findDrafts 中實(shí)現(xiàn) ArticlesService 方法:
// src/articles/articles.service.ts


@Injectable()

export class ArticlesService {

  constructor(private prisma: PrismaService) {}


  create(createArticleDto: CreateArticleDto) {

    return 'This action adds a new article';

  }


  findDrafts() {

    return this.prisma.article.findMany({ where: { published: false } });

  }


  // ...


}
GET /articles/drafts 端點(diǎn)現(xiàn)在應(yīng)該已經(jīng)在 Swagger API 頁面中可用了。
注意:我建議您在完成實(shí)施后通過 Swagger API 頁面測試每個終端節(jié)點(diǎn)。
此端點(diǎn)的控制器路由處理器名為findOne。它的實(shí)現(xiàn)如下所示:
// src/articles/articles.controller.ts


@Get(':id')

findOne(@Param('id') id: string) {

  return this.articlesService.findOne(+id);

}路由接受一個動態(tài)的id參數(shù),該參數(shù)被傳遞給findOne控制器路由處理程序。由于Article模型具有整數(shù)id字段,因此需要使用id運(yùn)算符將+參數(shù)轉(zhuǎn)換為數(shù)字。
現(xiàn)在,更新 findOne 中的 ArticlesService 方法,以返回具有給定id的文章:
// src/articles/articles.service.ts

@Injectable()

export class ArticlesService {

  constructor(private prisma: PrismaService) {}


  create(createArticleDto: CreateArticleDto) {

    return 'This action adds a new article';

  }


  findAll() {

    return this.prisma.article.findMany({ where: { published: true } });

  }


  findOne(id: number) {

    return This action returns a #${id} article;
    return this.prisma.article.findUnique({ where: { id } });
  }
}
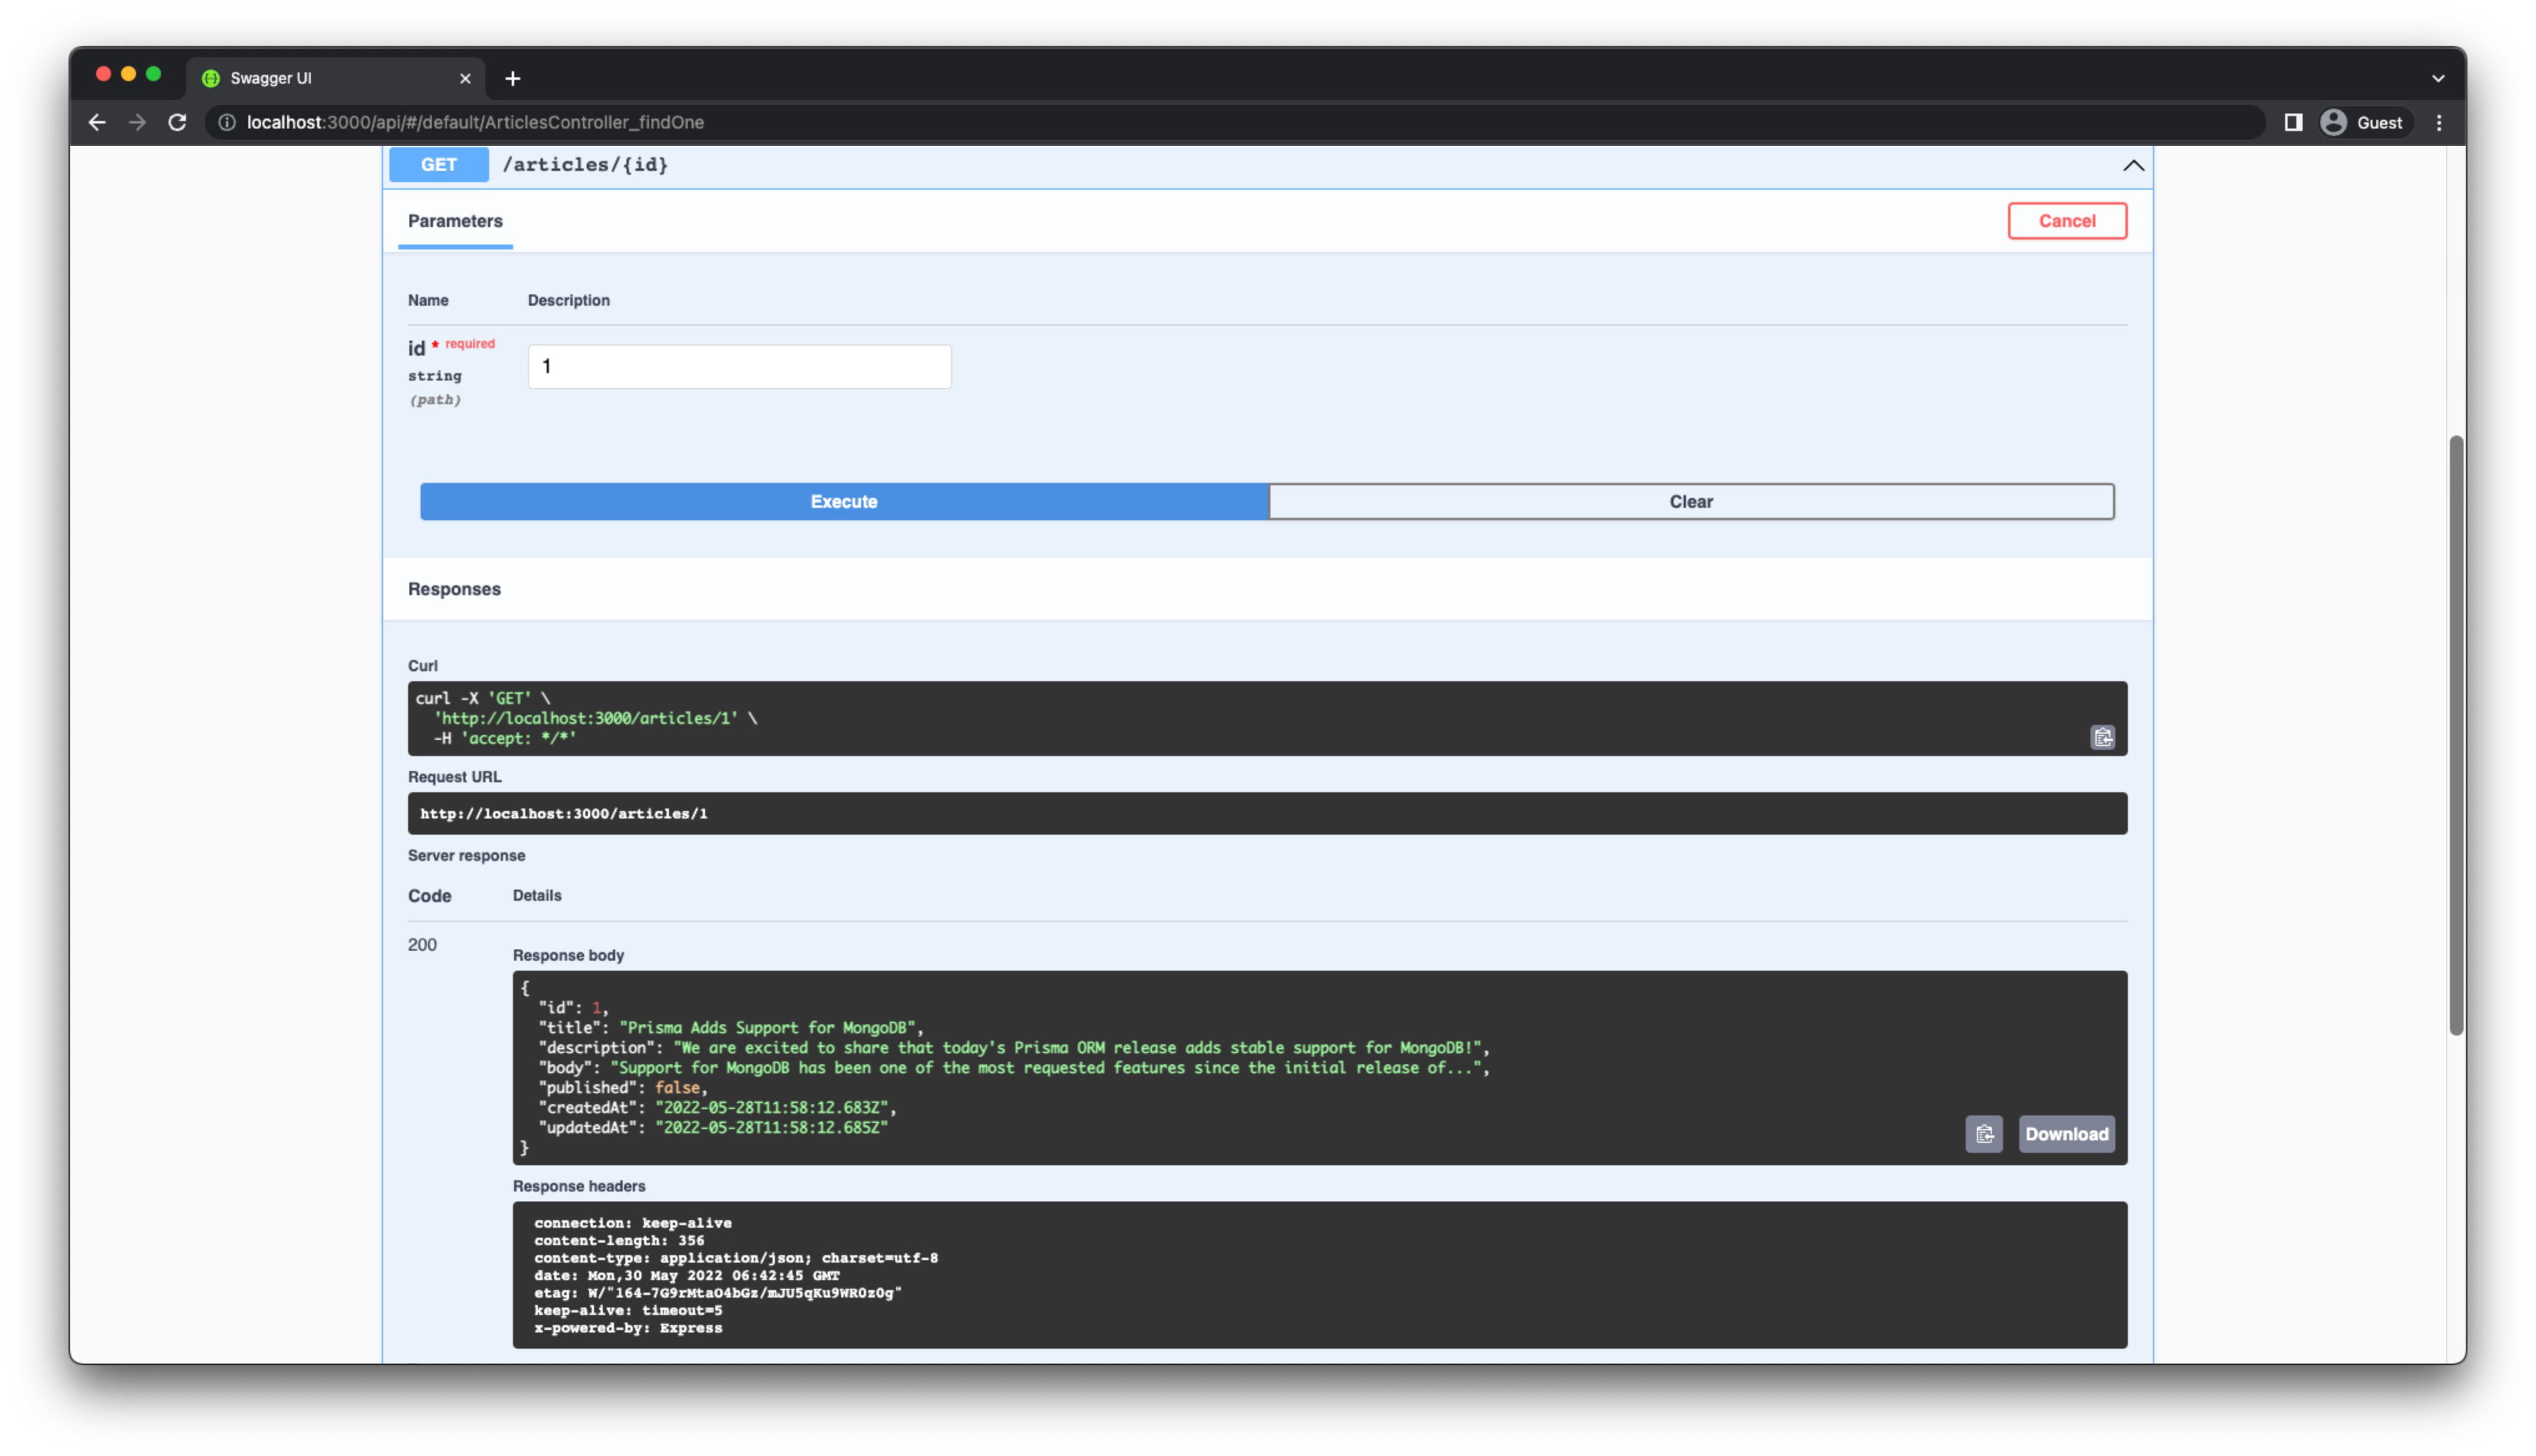
請訪問 http://localhost:3000/api,然后點(diǎn)擊 GET /articles/{id} 下拉菜單。點(diǎn)擊“Try it out”(試用),在 id 參數(shù)中輸入一個有效的值,接著點(diǎn)擊“Execute”(執(zhí)行)來查看結(jié)果。
這是創(chuàng)建新文章的端點(diǎn),此端點(diǎn)的控制器路由處理程序稱為 create。它的實(shí)現(xiàn)如下所示:
// src/articles/articles.controller.ts


@Post()

create(@Body() createArticleDto: CreateArticleDto) {

  return this.articlesService.create(createArticleDto);

}請注意,它在請求體中期望一個類型為CreateArticleDto的參數(shù)。DTO(Data Transfer Object,數(shù)據(jù)傳輸對象)是一個定義數(shù)據(jù)如何通過網(wǎng)絡(luò)發(fā)送的對象。目前,CreateArticleDto是一個空類。您需要向其中添加屬性,以定義請求正文的結(jié)構(gòu)。復(fù)制再試一次分享
// src/articles/dto/create-article.dto.ts


import { ApiProperty } from '@nestjs/swagger';


export class CreateArticleDto {

  @ApiProperty()

  title: string;


  @ApiProperty({ required: false })

  description?: string;


  @ApiProperty()

  body: string;


  @ApiProperty({ required: false, default: false })

  published?: boolean = false;

}
需要使用 @ApiProperty 裝飾器來使類屬性對 SwaggerModule 可見。更多關(guān)于這方面的信息可以在NestJS文檔中找到。
現(xiàn)在,您應(yīng)該在Swagger API頁面的Schemas下定義 CreateArticleDto。UpdateArticleDto 的結(jié)構(gòu)是從 CreateArticleDto 定義中自動推斷出來的。因此,UpdateArticleDto 也在Swagger中進(jìn)行了定義。
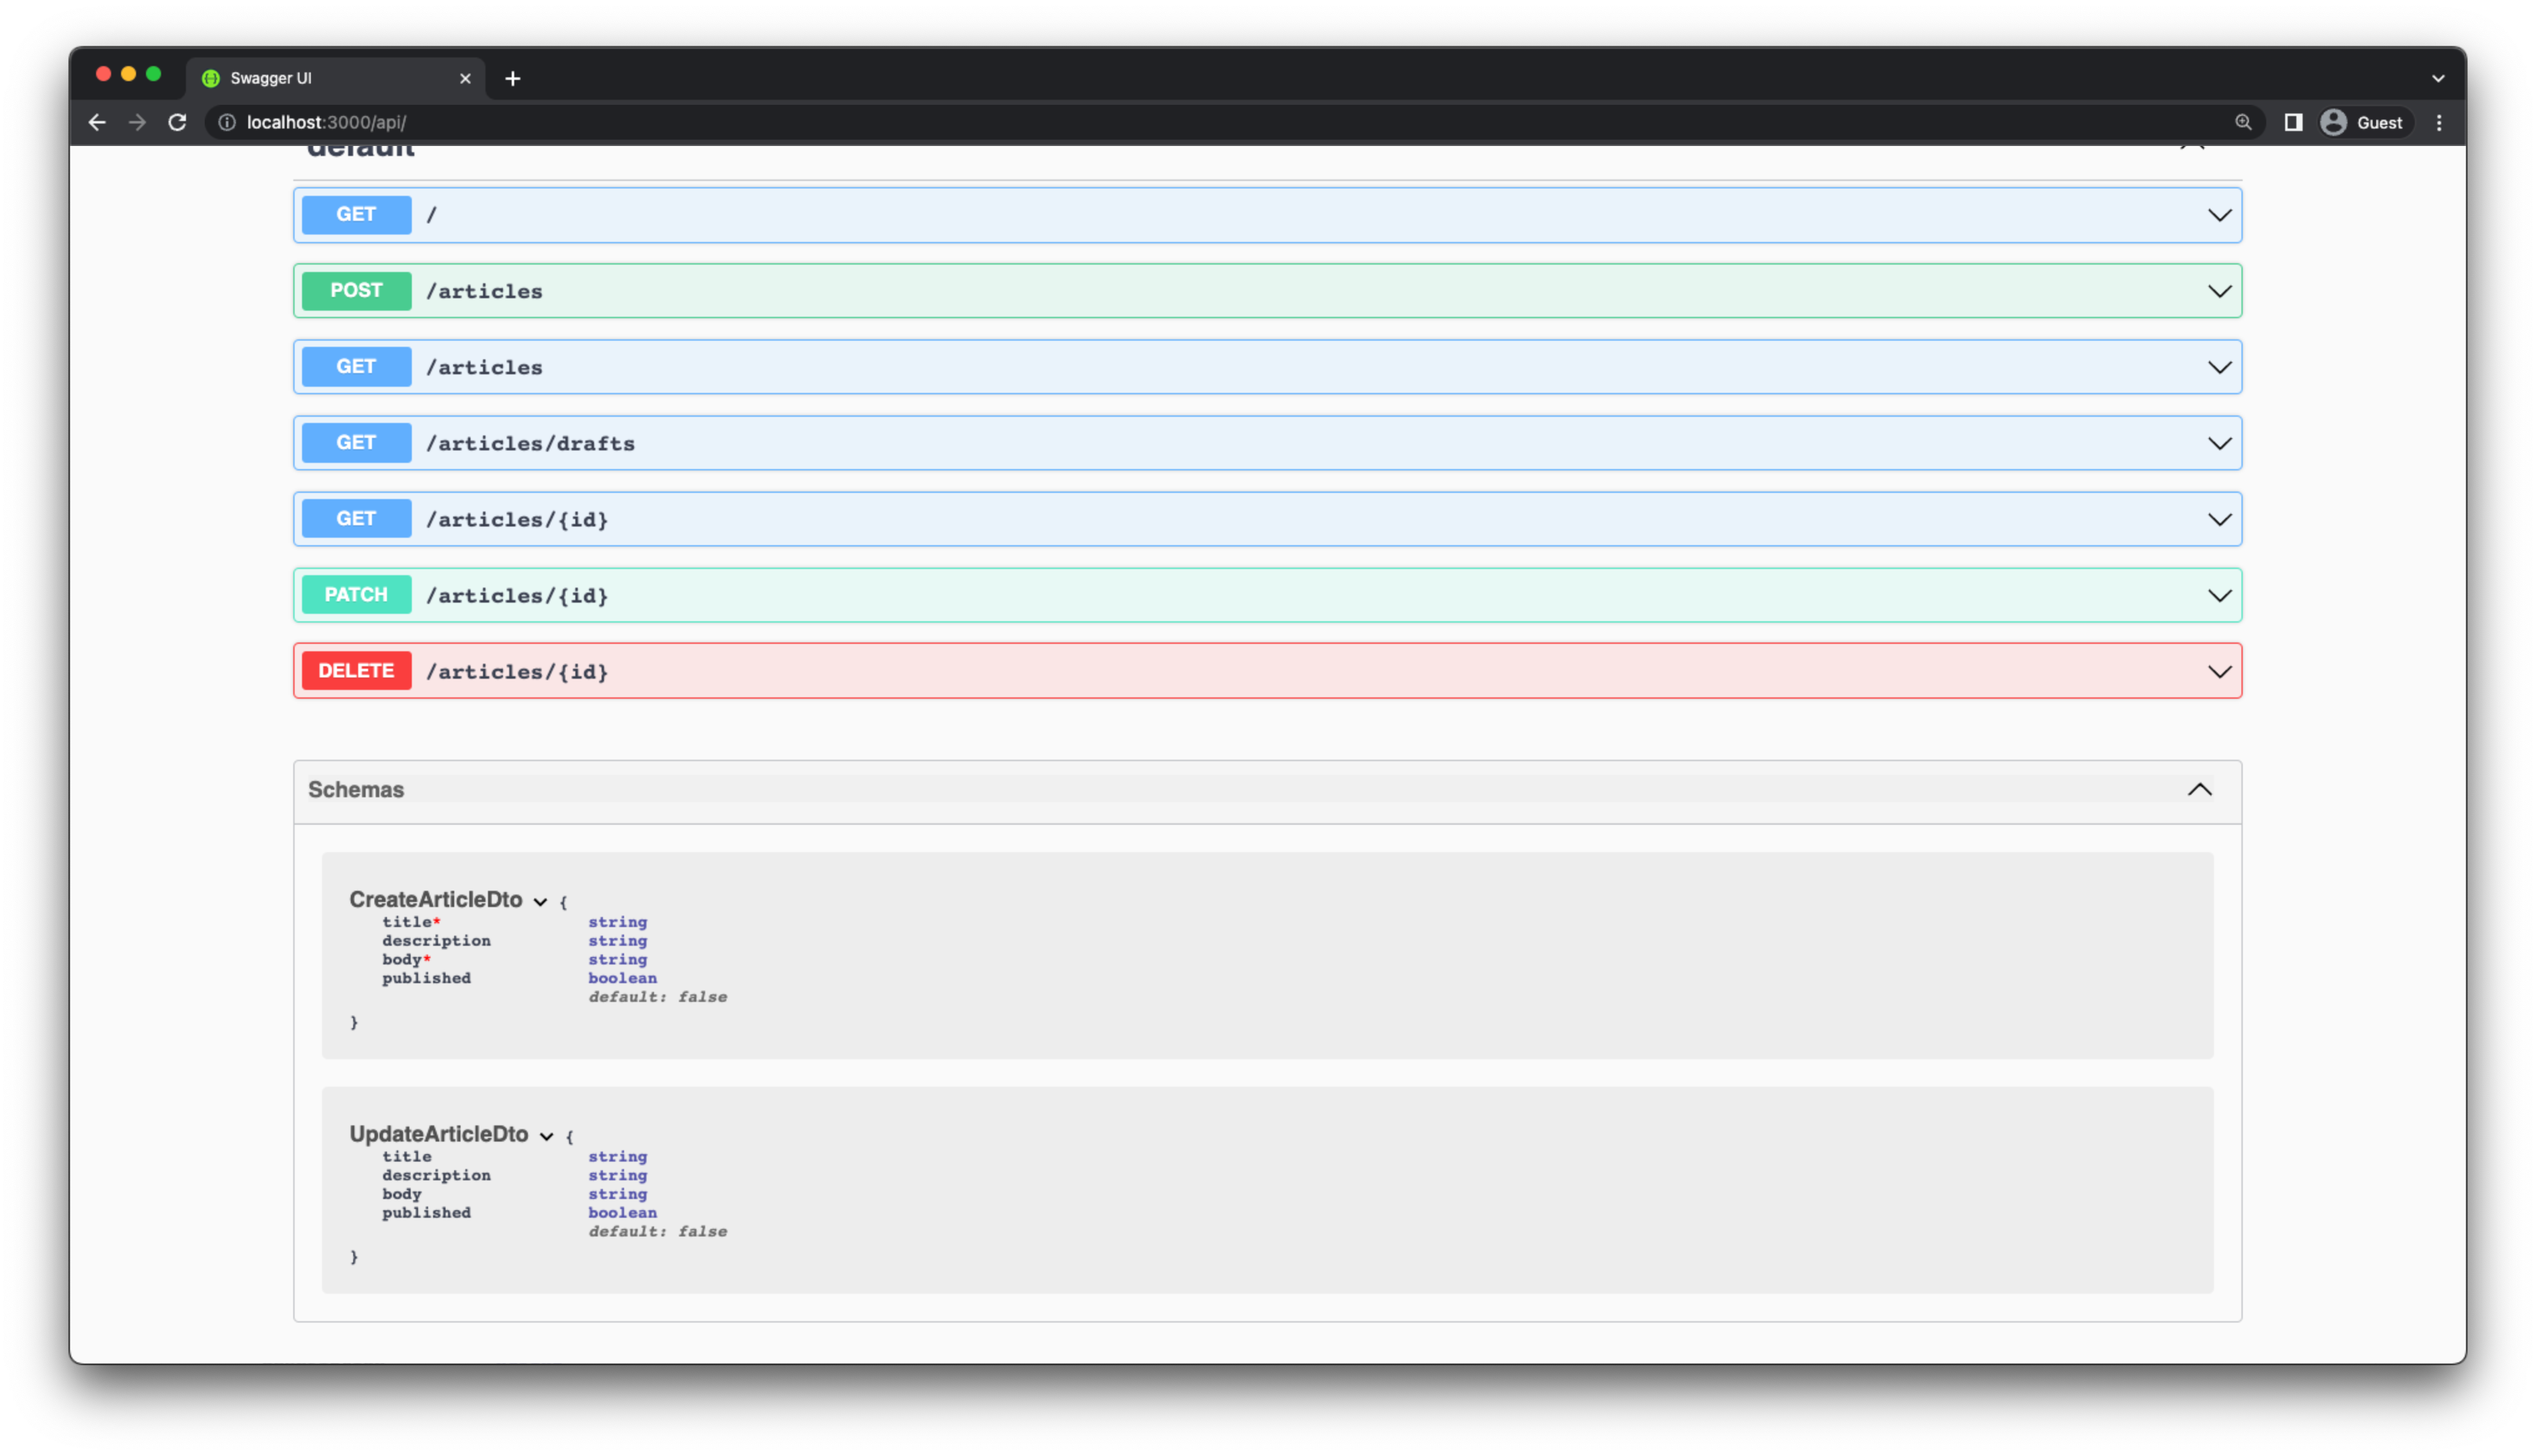
現(xiàn)在更新create中的ArticlesService方法,在數(shù)據(jù)庫中創(chuàng)建一個新項目:
// src/articles/articles.service.ts


@Injectable()

export class ArticlesService {

  constructor(private prisma: PrismaService) {

  }


  create(createArticleDto: CreateArticleDto) {

    return 'This action adds a new article';

    return this.prisma.article.create({ data: createArticleDto });

  }


  // ...

}此端點(diǎn)用于更新現(xiàn)有文章,此端點(diǎn)的路由處理程序稱為 update。它的實(shí)現(xiàn)如下所示:
// src/articles/articles.controller.ts


@Patch(':id')

update(@Param('id') id: string, @Body() updateArticleDto: UpdateArticleDto) {

  return this.articlesService.update(+id, updateArticleDto);

}
updateArticleDto 定義被定義為 PartialType 中的 CreateArticleDto。所以它可以擁有 CreateArticleDto 的所有屬性。
// src/articles/dto/update-article.dto.ts


import { PartialType } from '@nestjs/swagger';

import { CreateArticleDto } from './create-article.dto';


export class UpdateArticleDto extends PartialType(CreateArticleDto) {}
與之前一樣,您必須更新此操作對應(yīng)的服務(wù)方法:
// src/articles/articles.service.ts


@Injectable()

export class ArticlesService {

  constructor(private prisma: PrismaService) {}


  // ...


  update(id: number, updateArticleDto: UpdateArticleDto) {

    return This action updates a #${id} article;
    return this.prisma.article.update({
      where: { id },
      data: updateArticleDto,
    });
  }

  // ...
}
article.update 操作將嘗試使用給定的 Article 查找 id 記錄,并使用 updateArticleDto的數(shù)據(jù)更新它。
如果在數(shù)據(jù)庫中找不到此類 Article 記錄,Prisma 將返回錯誤。在這種情況下,API 不會返回用戶友好的錯誤消息。您將在以后的教程中學(xué)習(xí)NestJS的錯誤處理。
此端點(diǎn)用于刪除現(xiàn)有文章,此端點(diǎn)的路由處理程序稱為 remove。它的實(shí)現(xiàn)方法如下所示:
// src/articles/articles.controller.ts


@Delete(':id')

remove(@Param('id') id: string) {

  return this.articlesService.remove(+id);

}
就像之前一樣,轉(zhuǎn)到 ArticlesService 并更新相應(yīng)的方法:
// src/articles/articles.service.ts


@Injectable()

export class ArticlesService {

  constructor(private prisma: PrismaService) { }


  // ...


  remove(id: number) {

    return This action removes a #${id} article;
    return this.prisma.article.delete({ where: { id } });
  }
}
這是針對 articles 端點(diǎn)的最后一個操作。恭喜您的API即將就緒!??
在 @ApiTags 類中添加一個ArticlesController裝飾器,以便在Swagger中將所有articles端點(diǎn)分組在一起:
// src/articles/articles.controller.ts


import { ApiTags } from '@nestjs/swagger';


@Controller('articles')

@ApiTags('articles')

export class ArticlesController {

  // ...

}現(xiàn)在,該API頁面已將articles端點(diǎn)分組在一起。
如果您查看 Swagger 中每個端點(diǎn)下的“Responses”選項卡,您會發(fā)現(xiàn)“Description”是空的。這是因為 Swagger 還不知道任何端點(diǎn)的響應(yīng)類型。您將使用一些裝飾器來解決這個問題。
首先,您需要定義一個實(shí)體,Swagger 可以使用它來標(biāo)識返回的實(shí)體對象的結(jié)構(gòu)。為此,請更新 articles.entity.ts 文件中的 ArticleEntity 類,如下所示:
// src/articles/entities/article.entity.ts


import { Article } from '@prisma/client';

import { ApiProperty } from '@nestjs/swagger';


export class ArticleEntity implements Article {

  @ApiProperty()

  id: number;


  @ApiProperty()

  title: string;


  @ApiProperty({ required: false, nullable: true })

  description: string | null;


  @ApiProperty()

  body: string;


  @ApiProperty()

  published: boolean;


  @ApiProperty()

  createdAt: Date;


  @ApiProperty()

  updatedAt: Date;

}
這是Prisma Client生成的Article類型的實(shí)現(xiàn),每個屬性都添加了@ApiProperty裝飾器。
現(xiàn)在,是時候使用正確的響應(yīng)類型對控制器路由處理程序進(jìn)行注釋了。NestJS 有一組用于此目的的裝飾器。
// src/articles/articles.controller.ts


import { ApiCreatedResponse, ApiOkResponse, ApiTags } from '@nestjs/swagger';

import { ArticleEntity } from './entities/article.entity';


@Controller('articles')

@ApiTags('articles')

export class ArticlesController {

  constructor(private readonly articlesService: ArticlesService) {}


  @Post()

  @ApiCreatedResponse({ type: ArticleEntity })

  create(@Body() createArticleDto: CreateArticleDto) {

    return this.articlesService.create(createArticleDto);

  }


  @Get()

  @ApiOkResponse({ type: ArticleEntity, isArray: true })

  findAll() {

    return this.articlesService.findAll();

  }


  @Get('drafts')

  @ApiOkResponse({ type: ArticleEntity, isArray: true })

  findDrafts() {

    return this.articlesService.findDrafts();

  }


  @Get(':id')

  @ApiOkResponse({ type: ArticleEntity })

  findOne(@Param('id') id: string) {

    return this.articlesService.findOne(+id);

  }


  @Patch(':id')

  @ApiOkResponse({ type: ArticleEntity })

  update(@Param('id') id: string, @Body() updateArticleDto: UpdateArticleDto) {

    return this.articlesService.update(+id, updateArticleDto);

  }


  @Delete(':id')

  @ApiOkResponse({ type: ArticleEntity })

  remove(@Param('id') id: string) {

    return this.articlesService.remove(+id);

  }

}
您為 @ApiOkResponse、GET 和 PATCH 端點(diǎn)添加了 DELETE ,為 @ApiCreatedResponse 端點(diǎn)添加了 POST。type屬性用于指定返回類型,您可以在NestJS文檔中找到NestJS提供的所有響應(yīng)裝飾器。
現(xiàn)在,Swagger 應(yīng)該正確定義 API 頁面上所有端點(diǎn)的響應(yīng)類型。
恭喜!您已經(jīng)成功使用NestJS構(gòu)建了一個基礎(chǔ)的REST API。在本教程中,您完成了以下內(nèi)容:
本教程的一個重要收獲是,使用NestJS和Prisma構(gòu)建REST API是多么的簡單。這是一個非常高效的堆棧,用于快速構(gòu)建結(jié)構(gòu)良好、類型安全且可維護(hù)的后端應(yīng)用程序。
您可以在GitHub上找到本項目的源代碼。如果您在使用過程中遇到任何問題,歡迎隨時在倉庫中提出問題或提交PR。
原文鏈接:https://www.prisma.io/blog/nestjs-prisma-rest-api-7D056s1BmOL0