有了 API 密鑰之后,就可以進行測試啦。
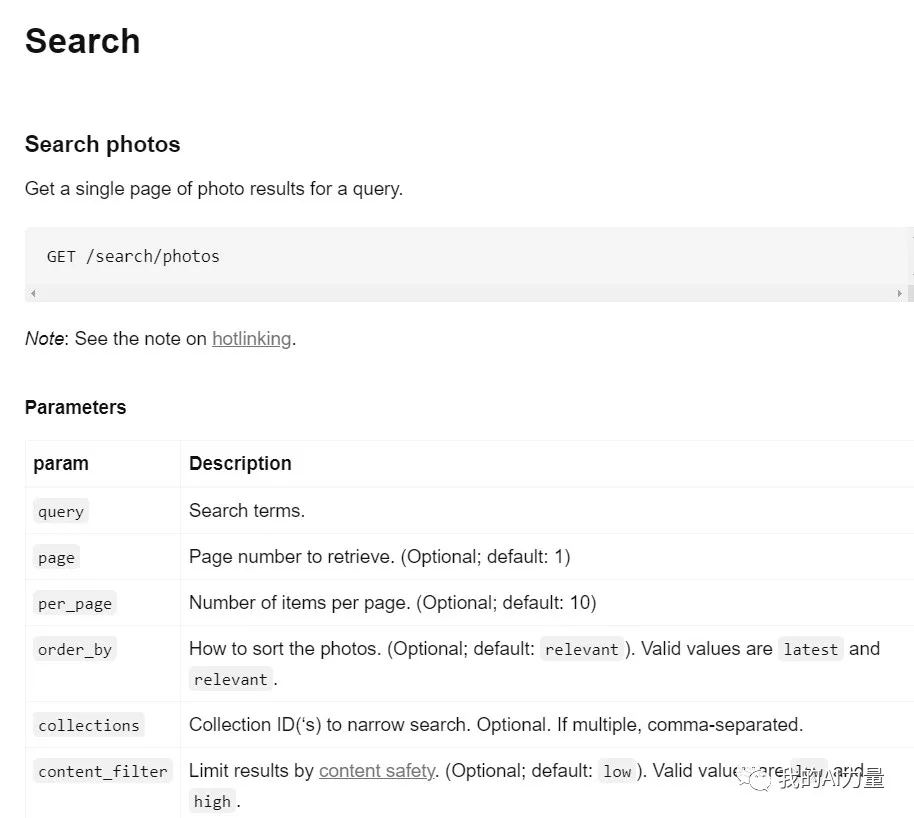
Unsplash API 的功能很多,因為我們需要通過 API 在 Unsplash 里搜索圖片,我看了下文檔,只需要用到 “Search Photos (搜索圖片)” 這個功能。
這個文檔可以幫助我們了解如何使用 Unsplash 的 API 搜索圖片。如果讀不懂也沒關系,稍后可以喂給 ChatGPT,它是能看懂的。
在創建 GPTs 之前,最好先測試下 API 是否能獲得成功的響應。目前 Postman 是最好的工具,如果沒有的話可以安裝一下。
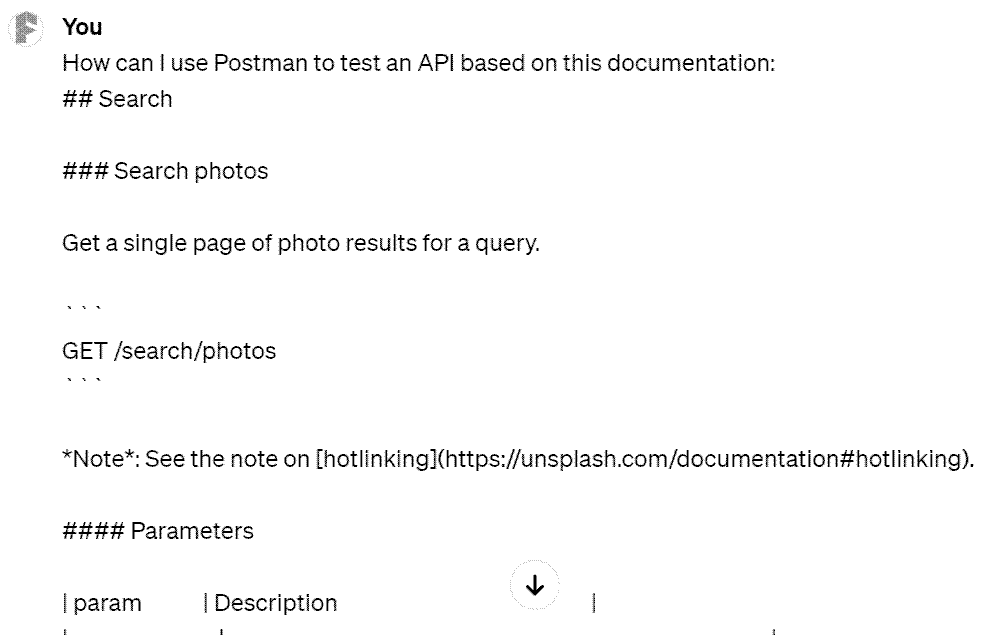
如果不知道如何用 Postman 進行測試的話,也可以問 ChatGPT 。我是這么寫提示詞的:
Prompt: How can I use Postman to test an API based on this documentation:
[Relevant API Document]
提示詞: 如何使用 Postman 測試基于此文檔的 API? [相關 API 文檔]
中括號里的內容就是喂給 ChatGPT 的 API 文檔。
提交給 ChatGPT 之后,它就生成了一份非常詳細的操作步驟,我直接跟著做就好。
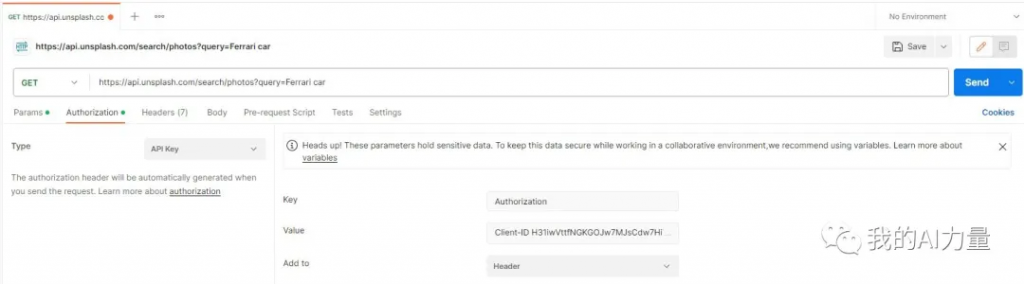
主要其實就兩步。1. 把 API Key 填入 Postman。
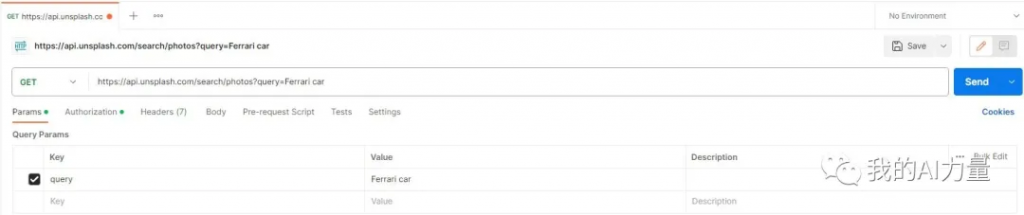
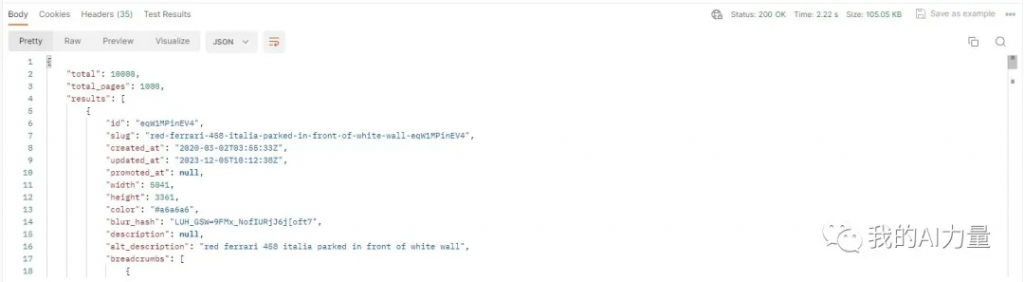
接著點擊 “Send” 按鈕就可以發送請求。發送完請求,就收到了響應。并且狀態碼顯示 “200”,表示成功響應。
Schema 就是告訴 GPTs,如何跟 Unsplash 的 API 相互溝通。這個 Schema 也可以讓 ChatGPT 輔助完成。用 Postman 測試的另一個目的就是,可以把 Postman 生成的 CURL 請求和響應提供給 ChatGPT 做參考。ChatGPT 有了這些信息,生成的 Schema 的準確度更高。
上圖就是響應的主體。不過 Unsplash 的響應有點長,直接扔給 ChatGPT 可能會超過 Token 限制。我只選取了其中最相關的部分提交,這樣 ChatGPT 寫出來的 Schema 也會更簡潔一些。
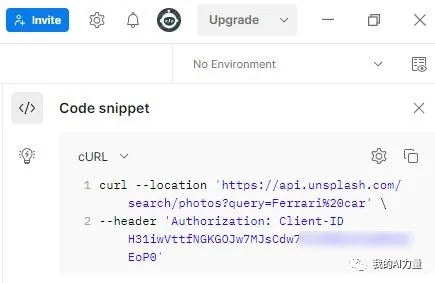
CURL 請求在 Postman 的右上角,如下圖所示。
有了這些信息,就可以讓 ChatGPT 幫我寫 Schema 啦。然而如何為 GPTs 寫 Schema 是很新的知識,ChatGPT 還不太了解。為此我找了個可以輔助造 GPTs 的 GPTs,訪問地址是:https://chat.openai.com/g/g-iThwkWDbA。用這個 GPTs 寫出的 Schema 準確度更高。我寫了這樣一個提示詞讓它幫我生成 Schema:
Prompt: Below is the curl request and response from the Unsplash API. Can you generate the schema for me?
[CURL Request and Response]
提示詞: 以下是 Unsplash API 的 curl 請求和響應。你能為我生成 Schema 嗎?
[CURL 請求和響應]
有了 Schema 之后,創建 GPTs 就簡單多啦。可以不管其它配置,先把剛才 GPT 生成的 Schema 填進去。

填進去以后發現報錯信息:
Could not find a valid URL in
servers無法在
servers中找到有效 URL
觀察一下 OpenAI 給的參考 Schema 就會發現少了 “Servers” 這個鍵,自己手動補充一下就好。
{

  "openapi": "3.1.0",

  "info": {

    "title": "Get weather data",

    "description": "Retrieves current weather data for a location.",

    "version": "v1.0.0"

  },

  "servers": [

    {

      "url": "https://weather.example.com"

    }

  ],

  "paths": {

    "/location": {

      "get": {

        "description": "Get temperature for a specific location",

        "operationId": "GetCurrentWeather",

        "parameters": [

          {

            "name": "location",

            "in": "query",

            "description": "The city and state to retrieve the weather for",

            "required": true,

            "schema": {

              "type": "string"

            }

          }

        ],

        "deprecated": false

      }

    }

  },

  "components": {

    "schemas": {}

  }

}
修改之后,就沒有報錯信息啦。
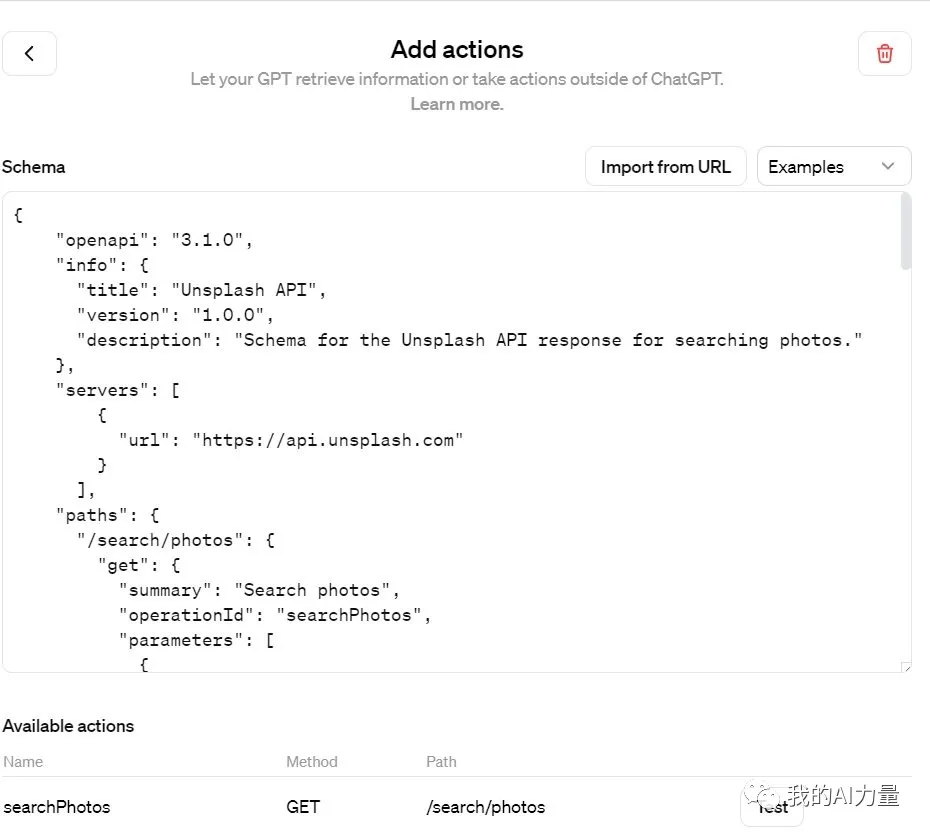
完整的 Schema 是這樣的:
{
"openapi": "3.1.0",
"info": {
"title": "Unsplash API",
"version": "1.0.0",
"description": "Schema for the Unsplash API response for searching photos."
},
"servers": [
{
"url": "https://api.unsplash.com"
}
],
"paths": {
"/search/photos": {
"get": {
"summary": "Search photos",
"operationId": "searchPhotos",
"parameters": [
{
"name": "query",
"in": "query",
"required": true,
"description": "The search query term.",
"schema": {
"type": "string"
}
}
],
"responses": {
"200": {
"description": "Successful response",
"content": {
"application/json": {
"schema": {
"type": "object",
"properties": {
"total": {
"type": "integer",
"description": "Total number of results."
},
"total_pages": {
"type": "integer",
"description": "Total number of pages."
},
"results": {
"type": "array",
"items": {
"type": "object",
"properties": {
"width": {
"type": "integer",
"description": "Width of the image."
},
"height": {
"type": "integer",
"description": "Height of the image."
},
"color": {
"type": "string",
"description": "Dominant color of the image."
},
"alt_description": {
"type": "string",
"description": "Alternative description of the image."
},
"urls": {
"type": "object",
"properties": {
"raw": {
"type": "string",
"format": "uri",
"description": "URL of the raw image."
},
"full": {
"type": "string",
"format": "uri",
"description": "URL of the full-size image."
},
"regular": {
"type": "string",
"format": "uri",
"description": "URL of the regular-size image."
},
"small": {
"type": "string",
"format": "uri",
"description": "URL of the small-size image."
},
"thumb": {
"type": "string",
"format": "uri",
"description": "URL of the thumbnail image."
},
"small_s3": {
"type": "string",
"format": "uri",
"description": "URL of the small-size image hosted on S3."
}
}
}
}
}
}
}
}
}
}
}
}
}
}
}
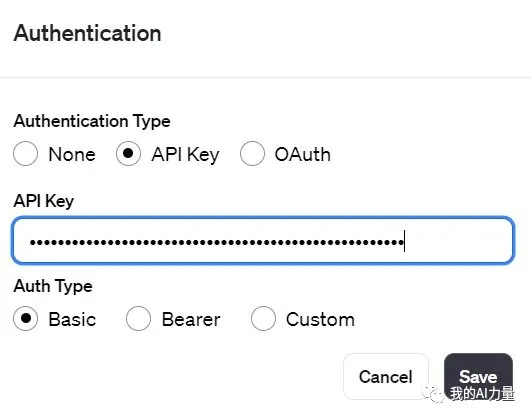
}接著就是在 GPTs 里面填好 API Key。取決于 API Key 的類型,一般來說都是下圖所示的填法。
然后可以完善 GPTs 的配置部分。Instructions 里面可以先說明如何利用 API,其它內容可以在測試好 GPTs 的 Actions 之后完善。我寫的 Instructions 內容如下:
When users initiate an image search on our platform, the system should employ the ‘searchPhotos’ action to fetch relevant results. The task involves several key steps:
- Implement the ‘searchPhotos’ action to retrieve image search results based on user queries.
- For each image result, extract and display the following details:
- The URL of the image, using ‘urls.regular’ as the source.
- A brief description of the image.
- The dimensions of the image, specifically its width and height.
- The name of the image’s author, sourced from ‘user.name’.
- Configure the display settings to show a default of three random images per search result.
當用戶在我們的平臺上發起圖片搜索時,系統應使用 “searchPhotos “操作來獲取相關結果。這項任務涉及幾個關鍵步驟:
- 執行 “searchPhotos “操作,根據用戶查詢檢索圖片搜索結果。
- 對于每個圖像結果,提取并顯示以下詳細信息:
- 圖片的 URL,使用 “urls.regular “作為來源。
- 圖片的簡要描述。
- 圖片的尺寸,尤其是寬度和高度。
- 圖片作者的姓名,來源于 “user.name”。
- 配置顯示設置,使每個搜索結果默認顯示三張隨機圖片。
接著就可以進行測試啦。如下圖所示,測試成功,大功告成。
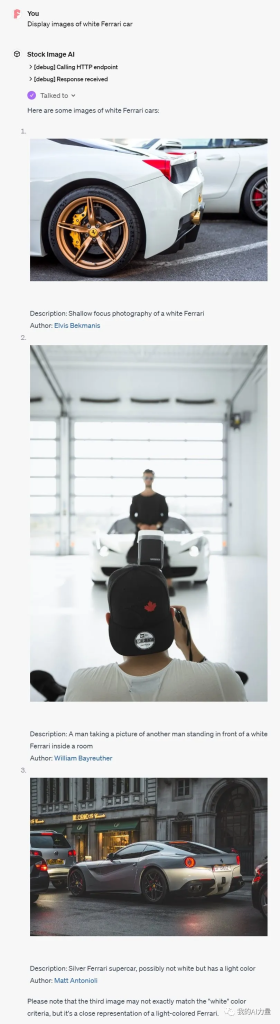
創建 AI 應用程序放到去年,我連做夢都想不出來。如今,我也可以徒手造一個出來啦。創造的過程本身就是一種幸福。希望本文對你有所啟發,也能收獲同樣的幸福體驗。
文章轉自微信公眾號@Vito的AI力量